
How to Use
How to Shoot Volumetric Video by Rememory
With LiDAR-equipped iPhone/iPad, you can easily shoot, edit, and share volumetric video with just one device!
1. Preparation: Let's create a new scene.
01. Add a scene
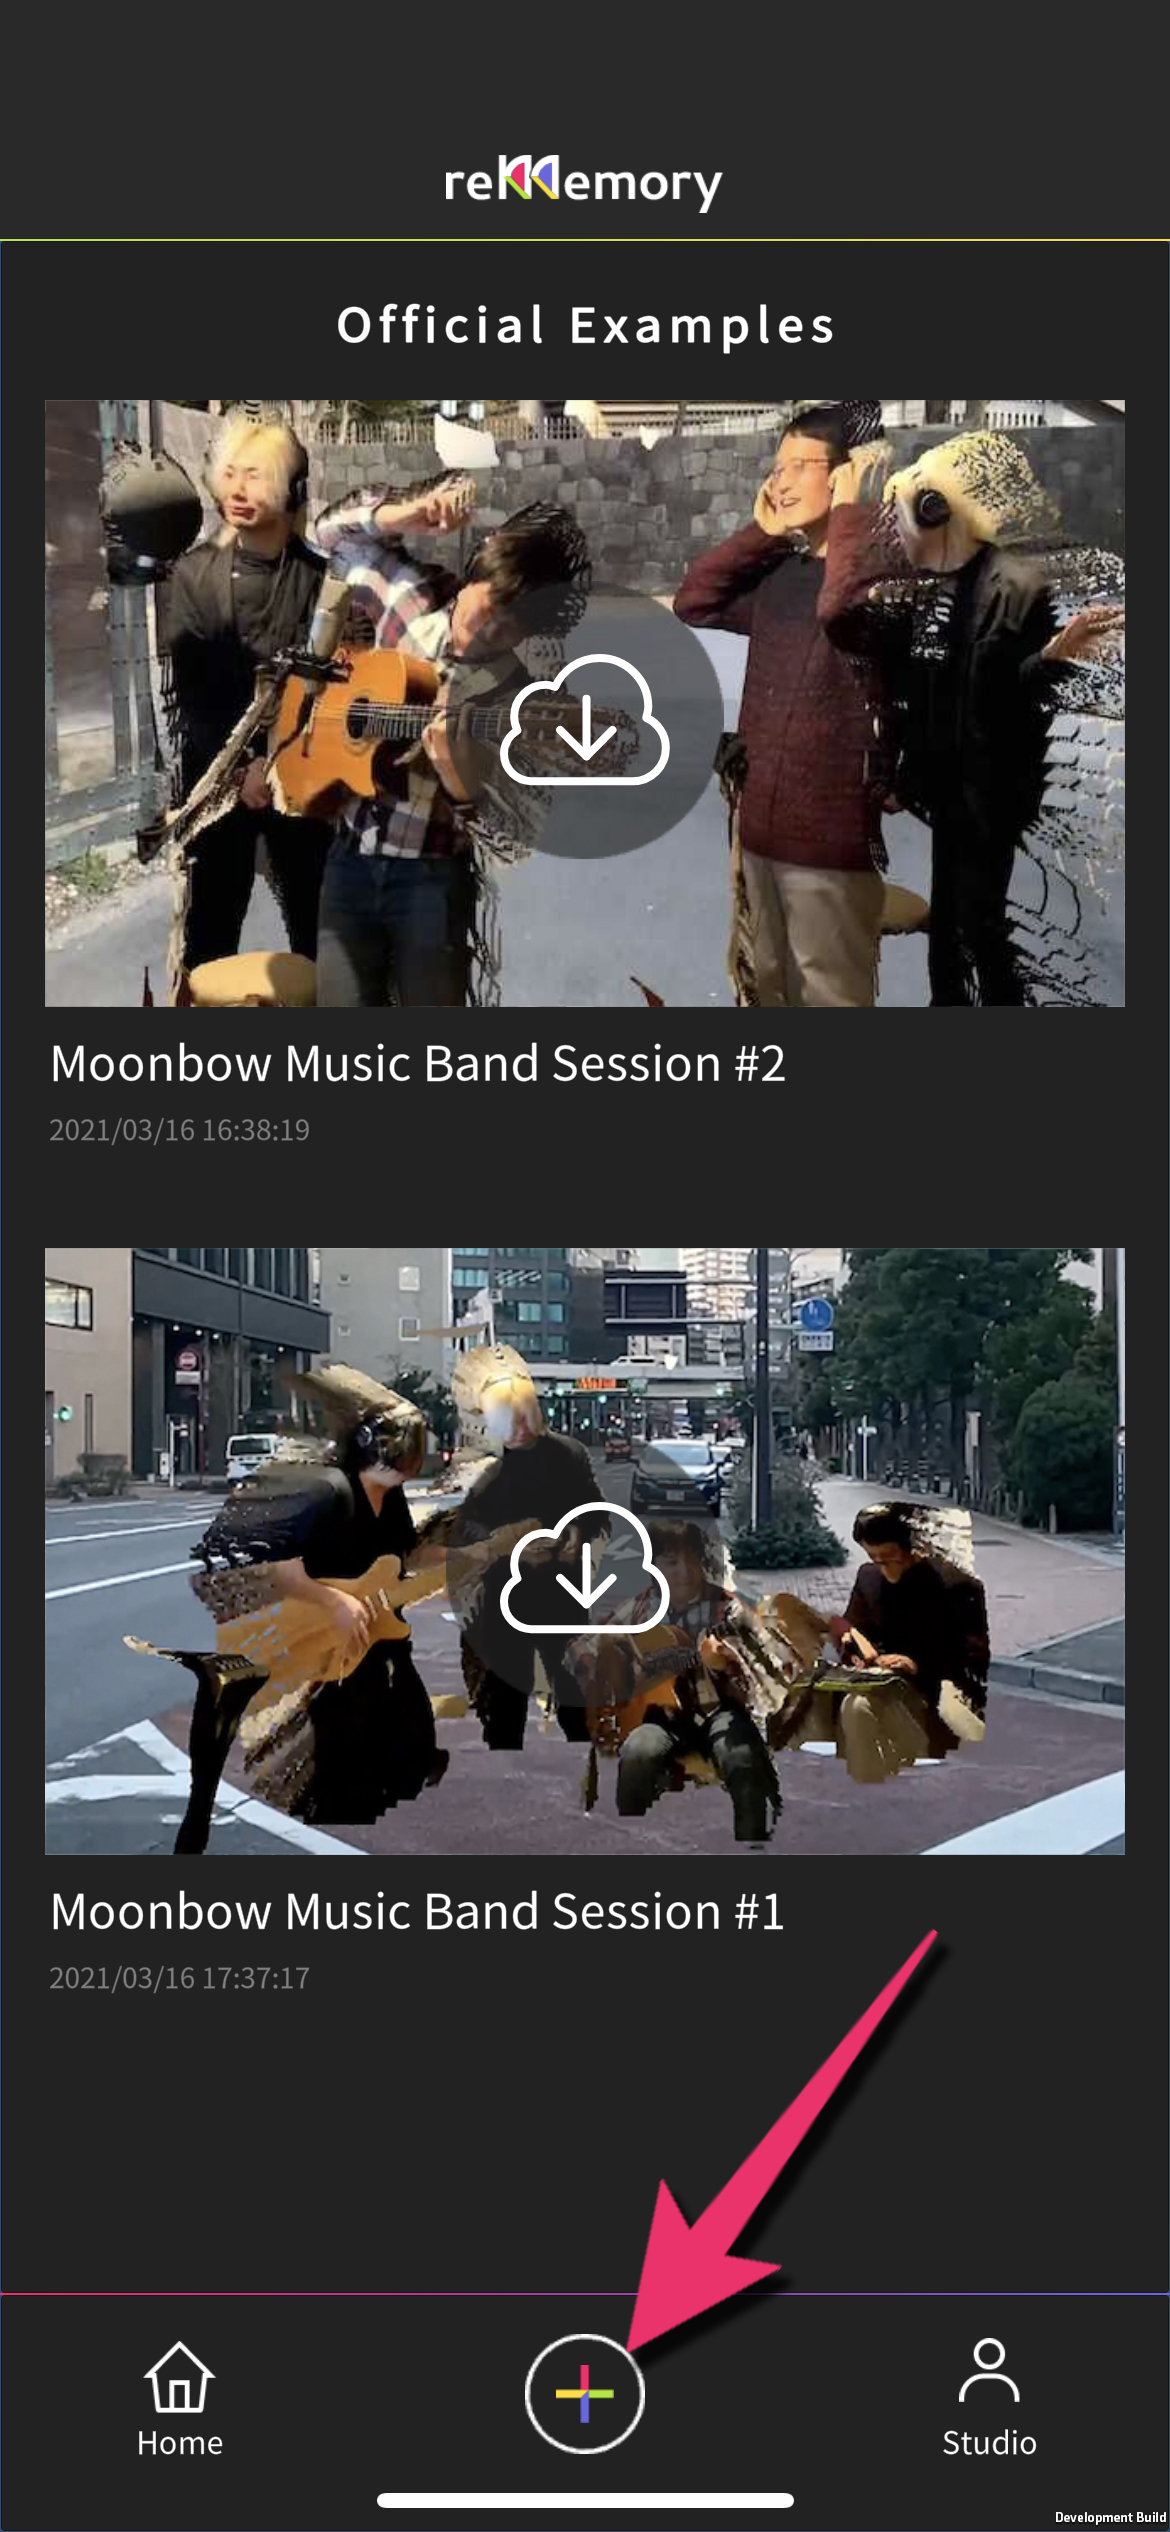
Tap the "+" button at the bottom center to create a new scene.
02. Enter a scene name
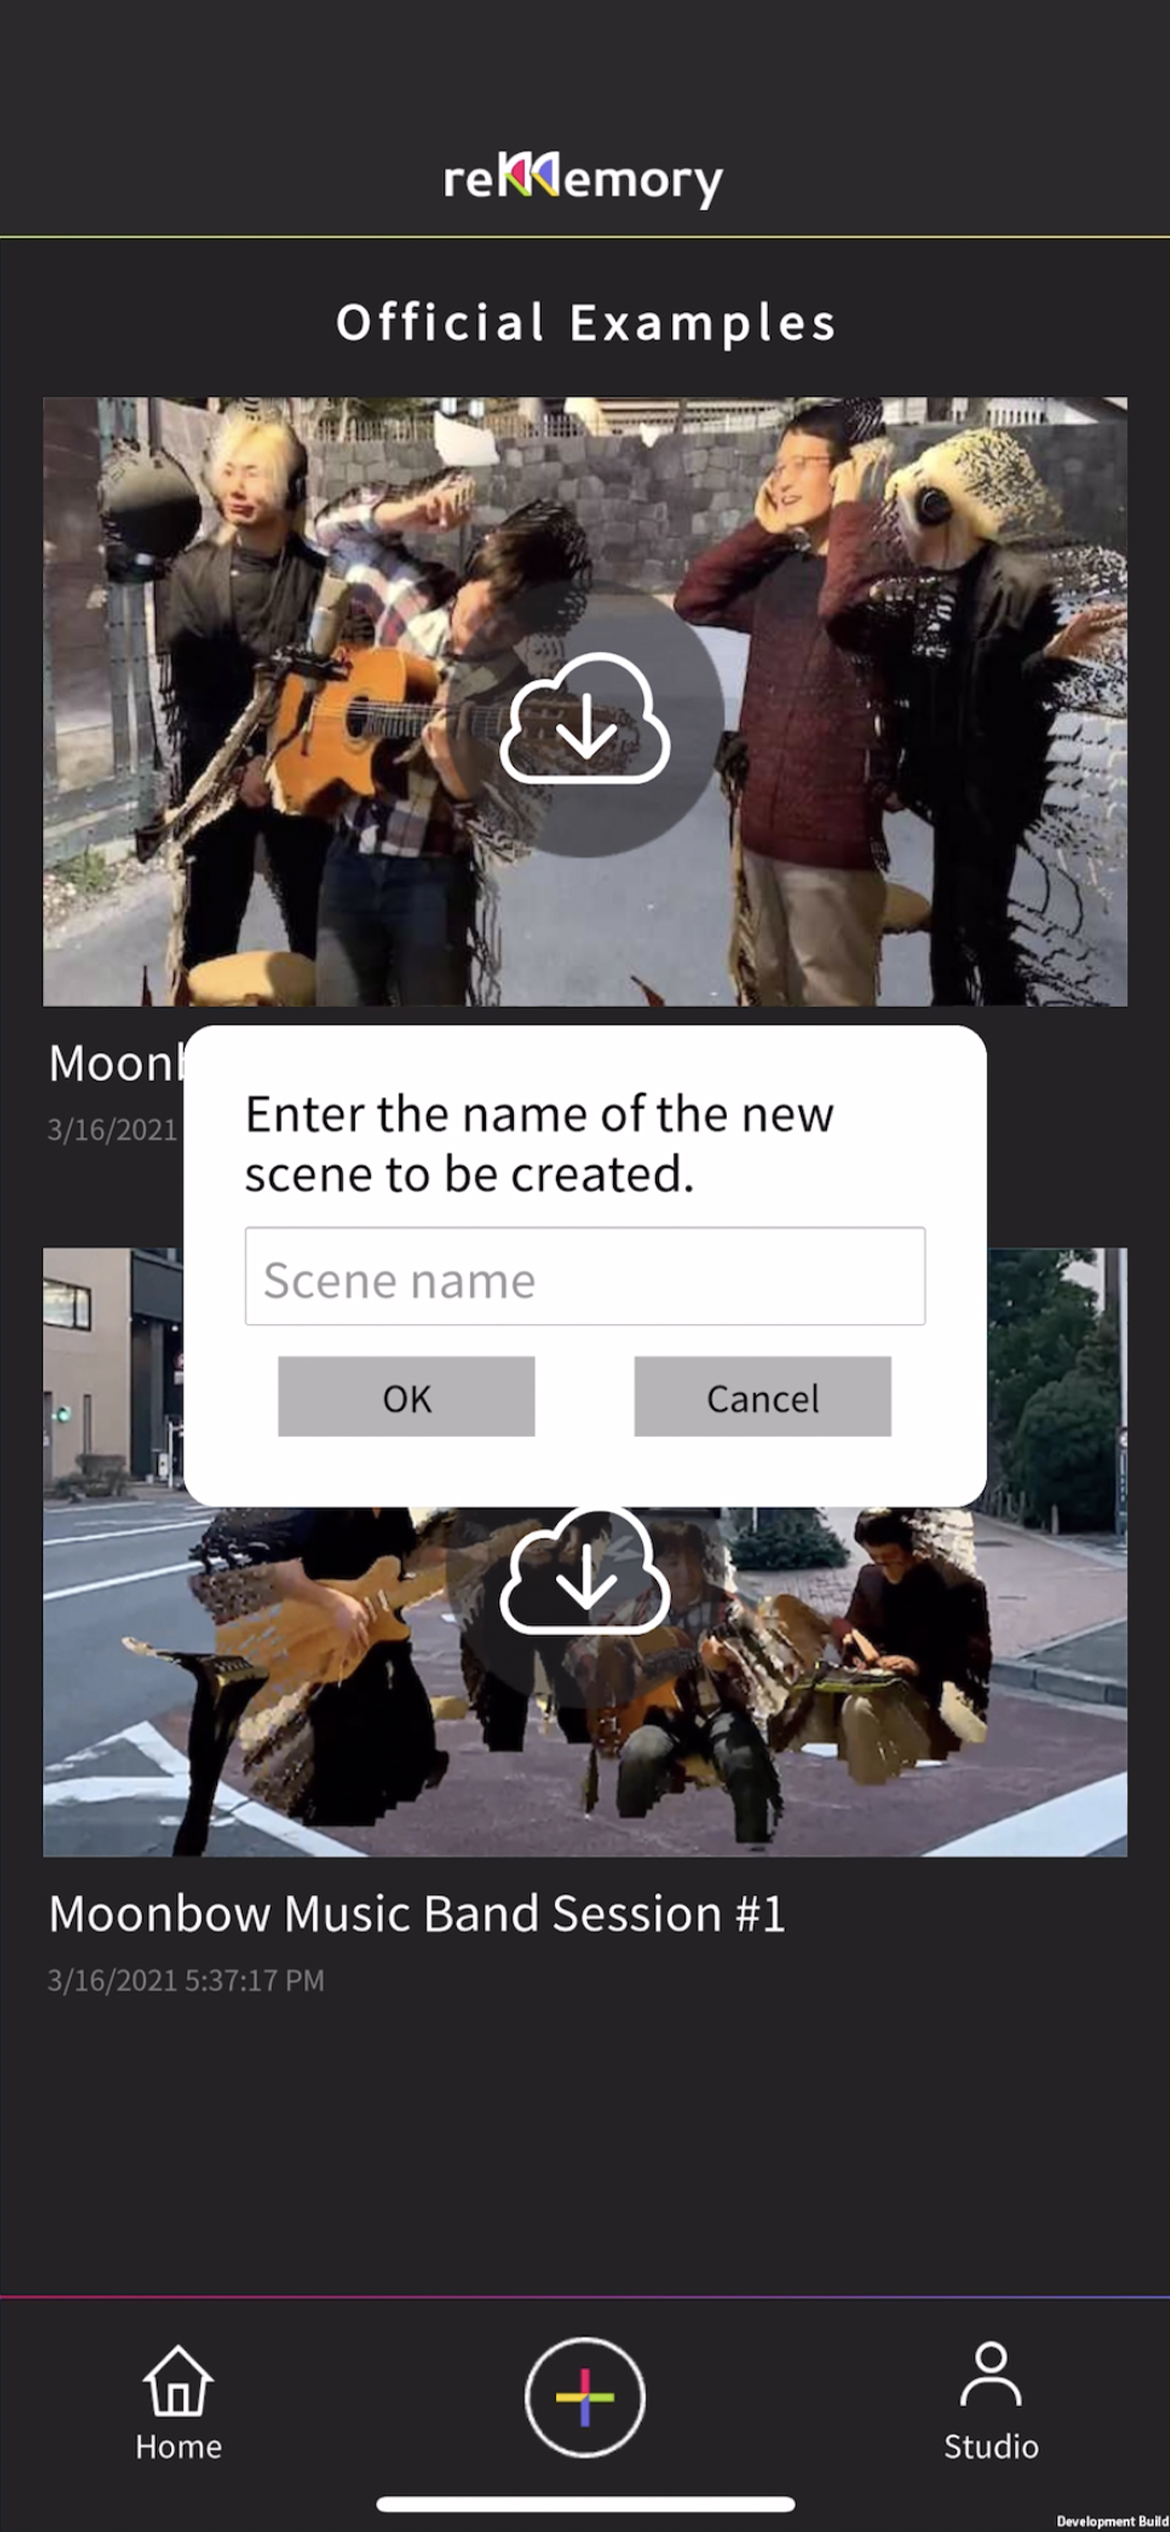
Enter a scene name and press OK.
2. Preparation: Determine the origin position.
01. Detect plane
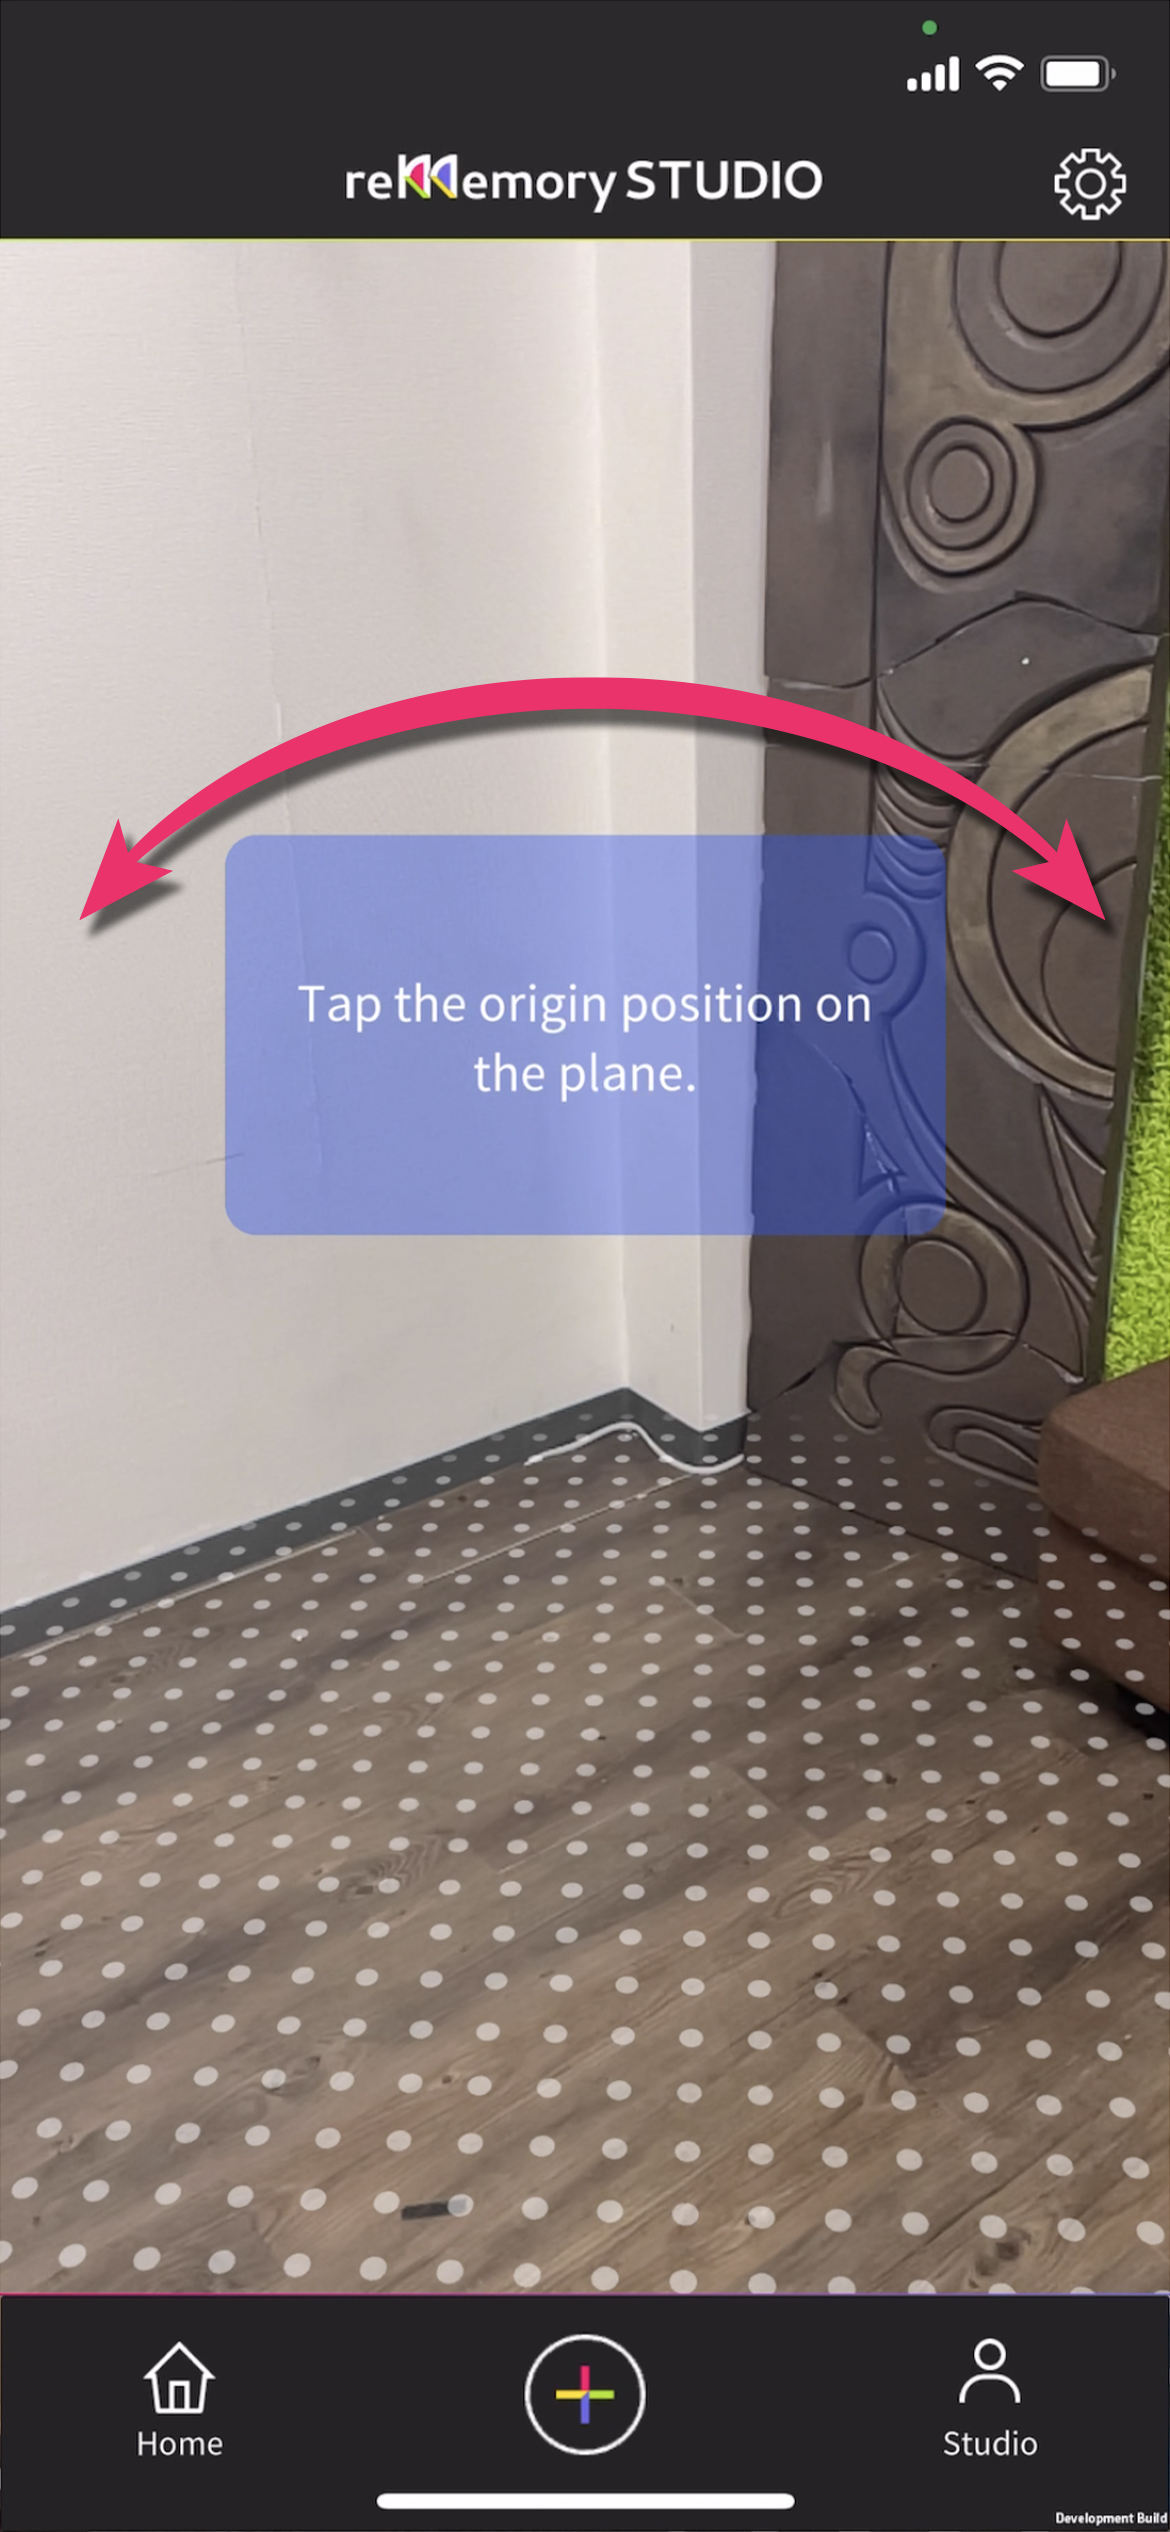
Once the camera is activated, slowly look around with the camera until a dot appears on the flat surface.
02. Select the origin position
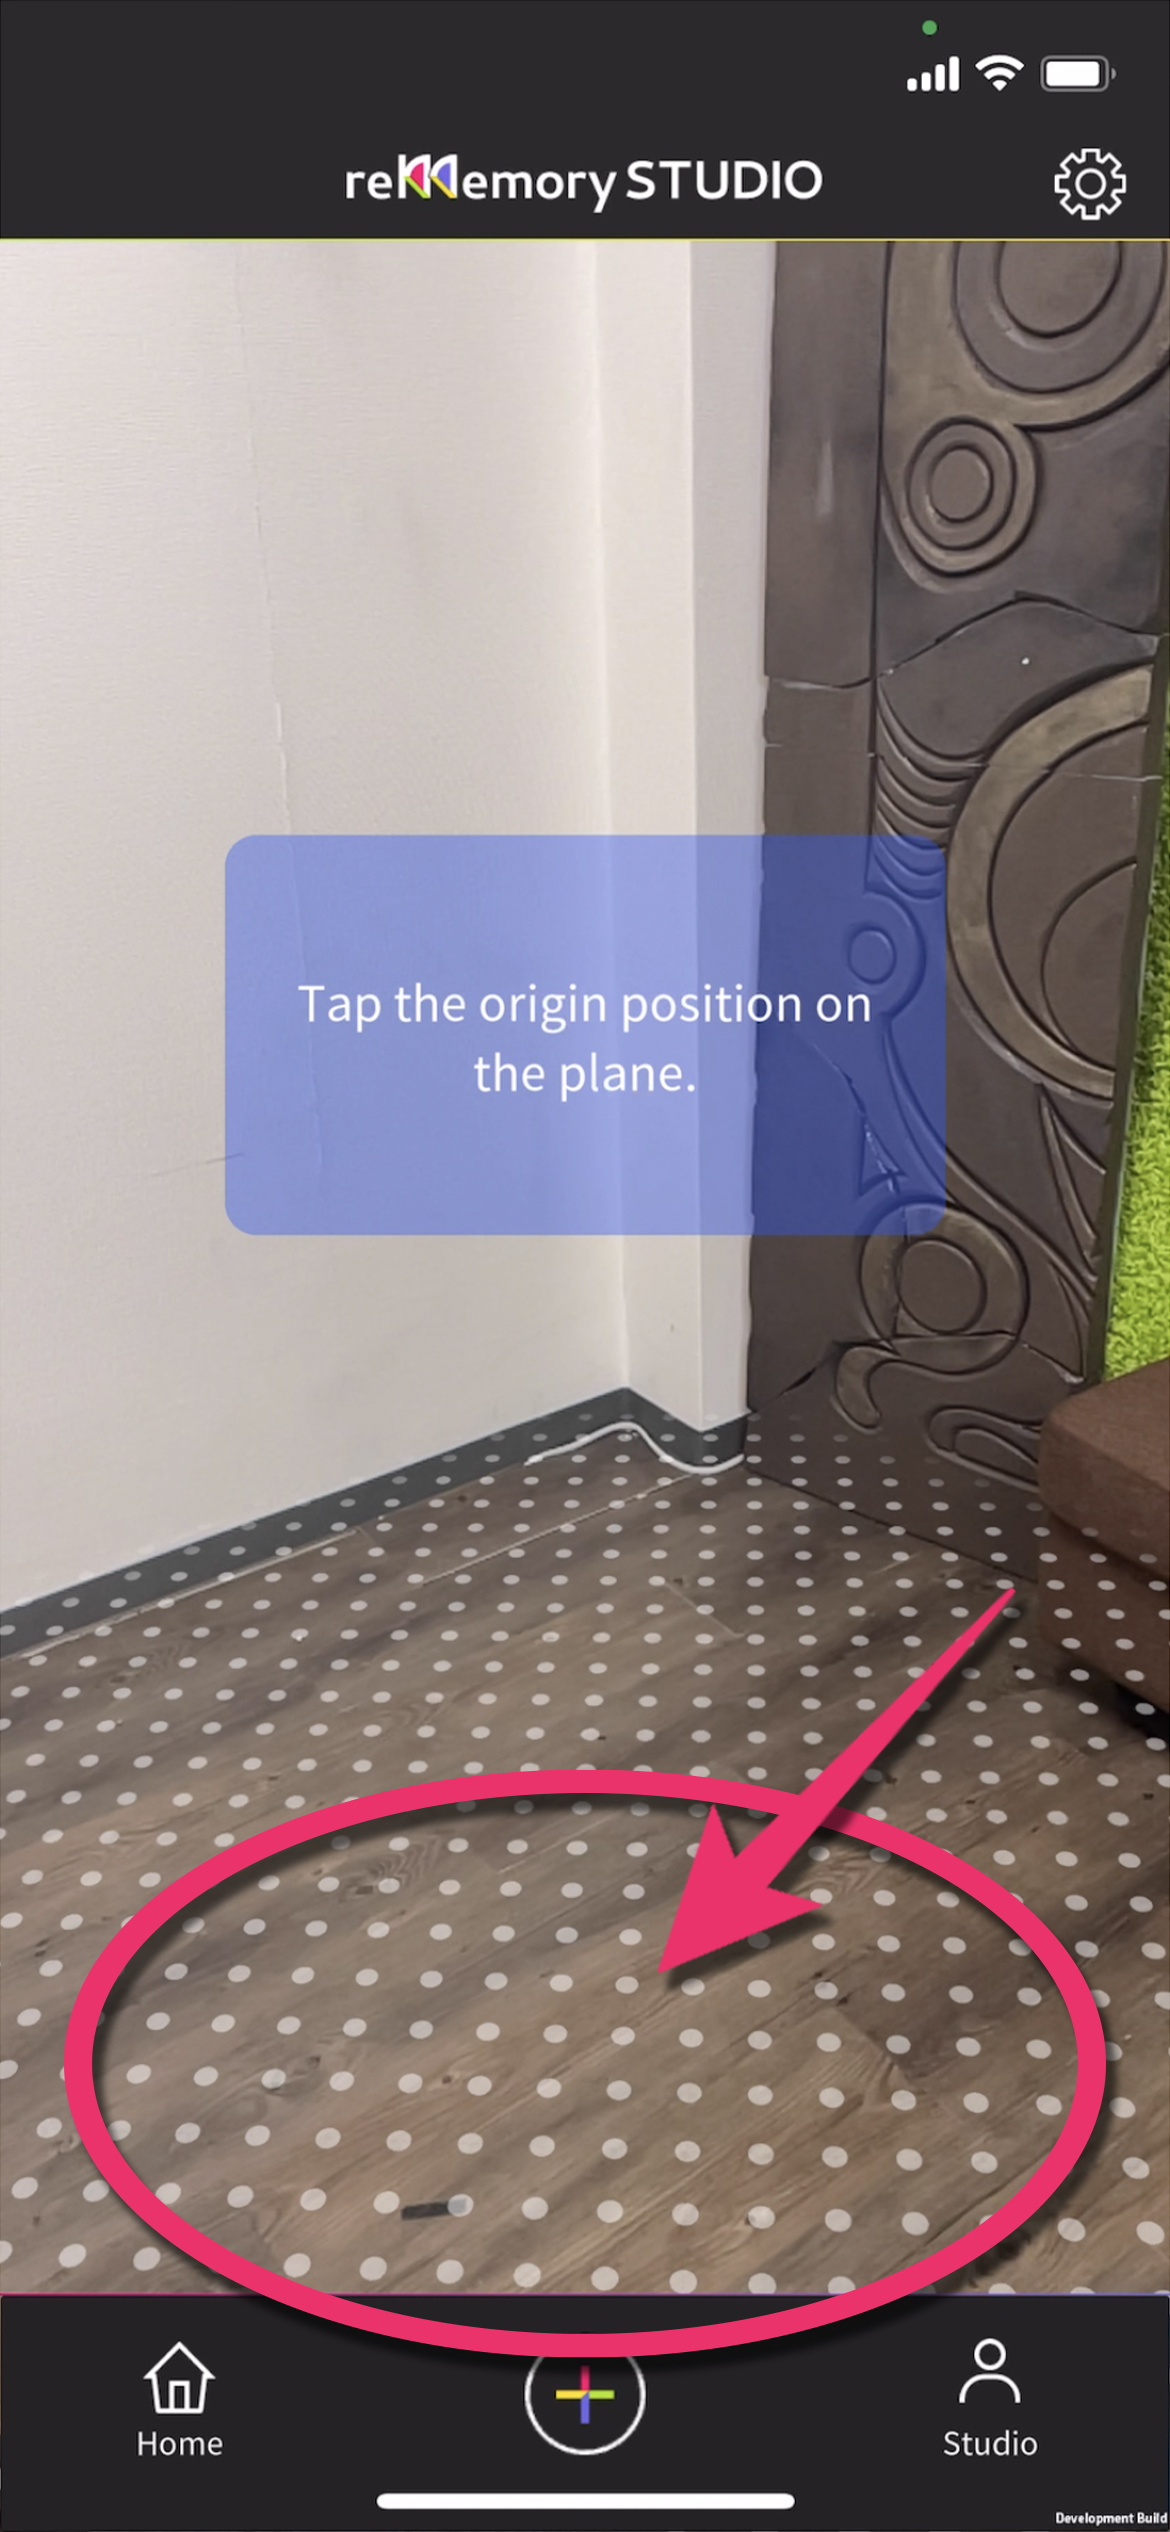
From the flat surface with the dot, select and tap the origin position for the shot. This position will serve as a reference point when playing back the captured 3D image elsewhere, so choose a location as close as possible to where your subject will be.
03. Determin the origin position
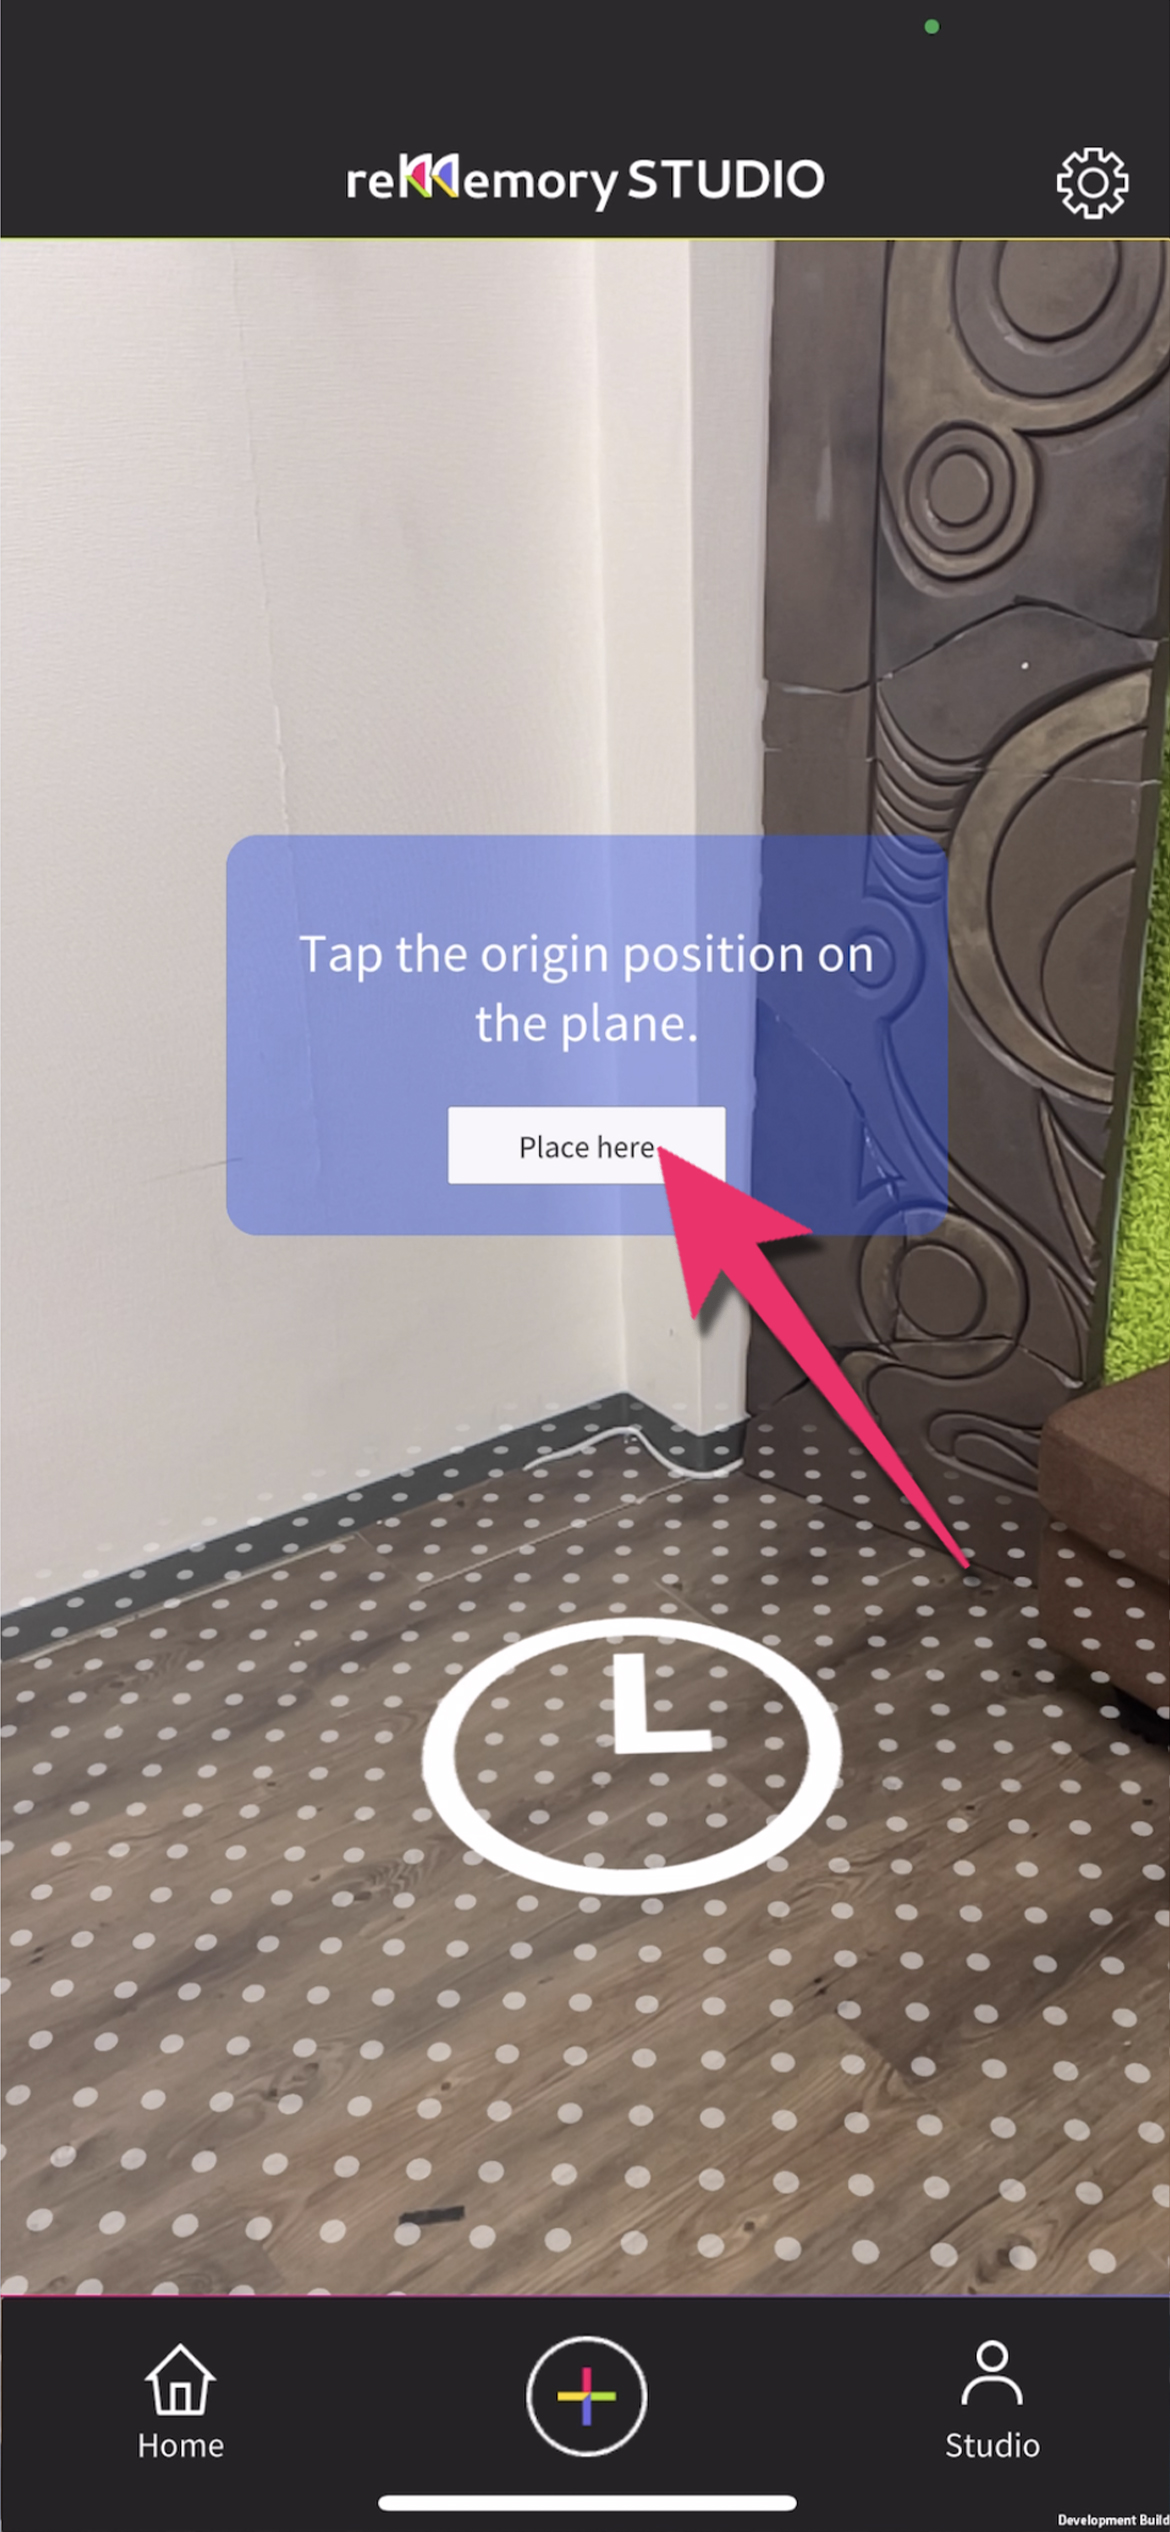
When you tap the origin position, the clock symbol will appear on the plane, and if it is OK, press the "Place here" button. If you want to select a different position, tap another location on the plane to change the position of the mark.
3. Shooting
01. Shooting
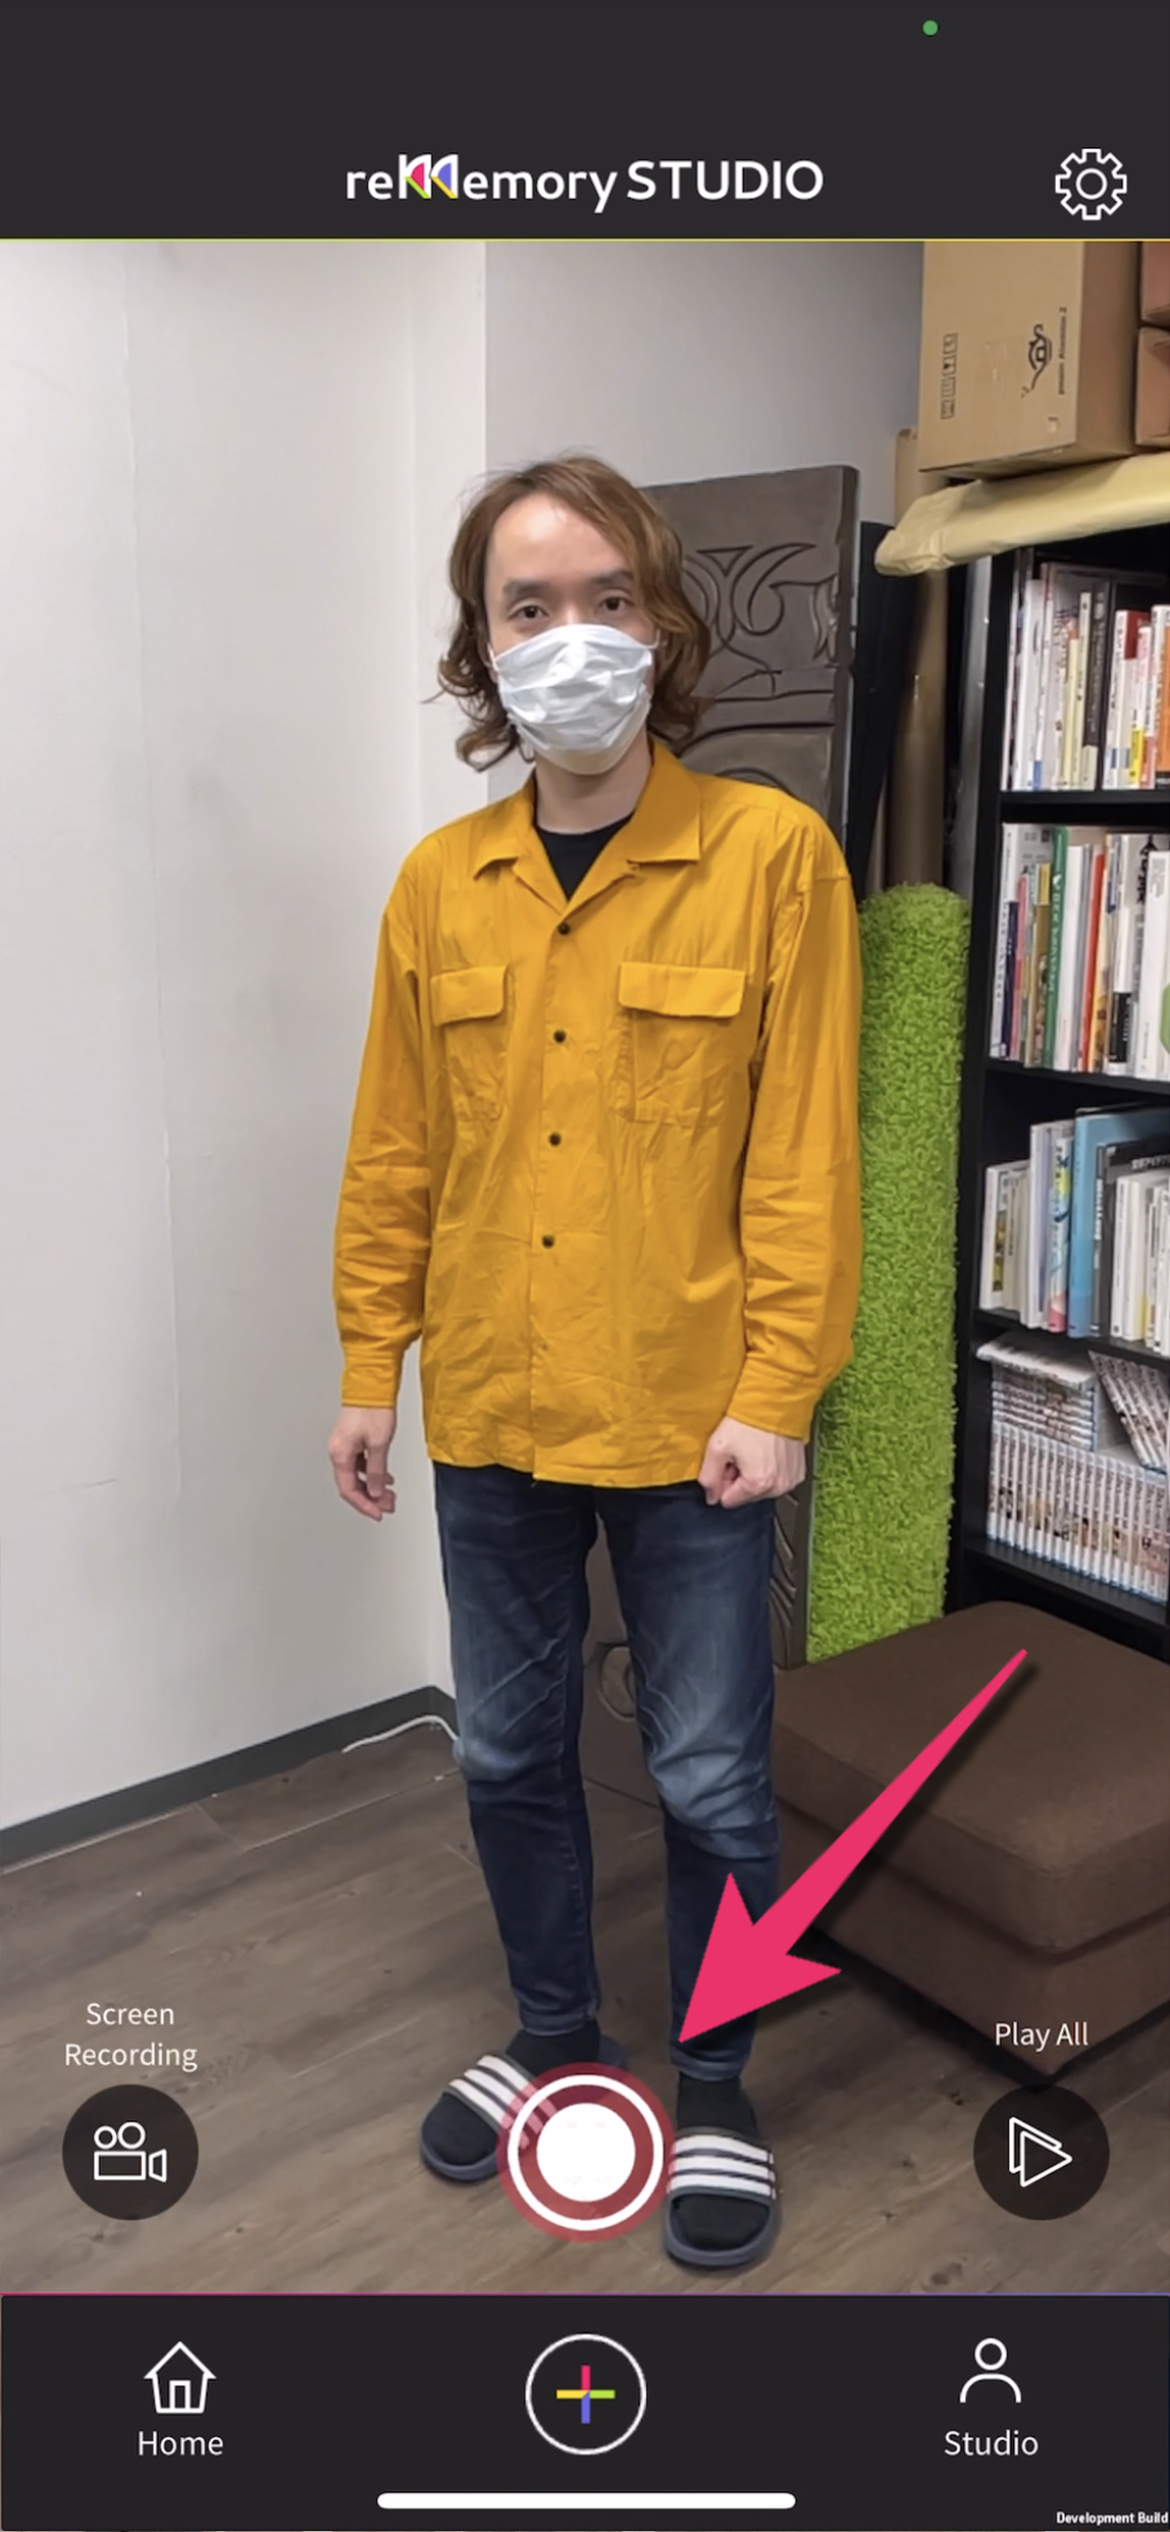
Place the subject in the screen and press the shoot button at the bottom center of the screen. The camera will automatically stop shooting after 6 seconds by default, or you can manually stop shooting by pressing the button again before the 6 seconds is up.
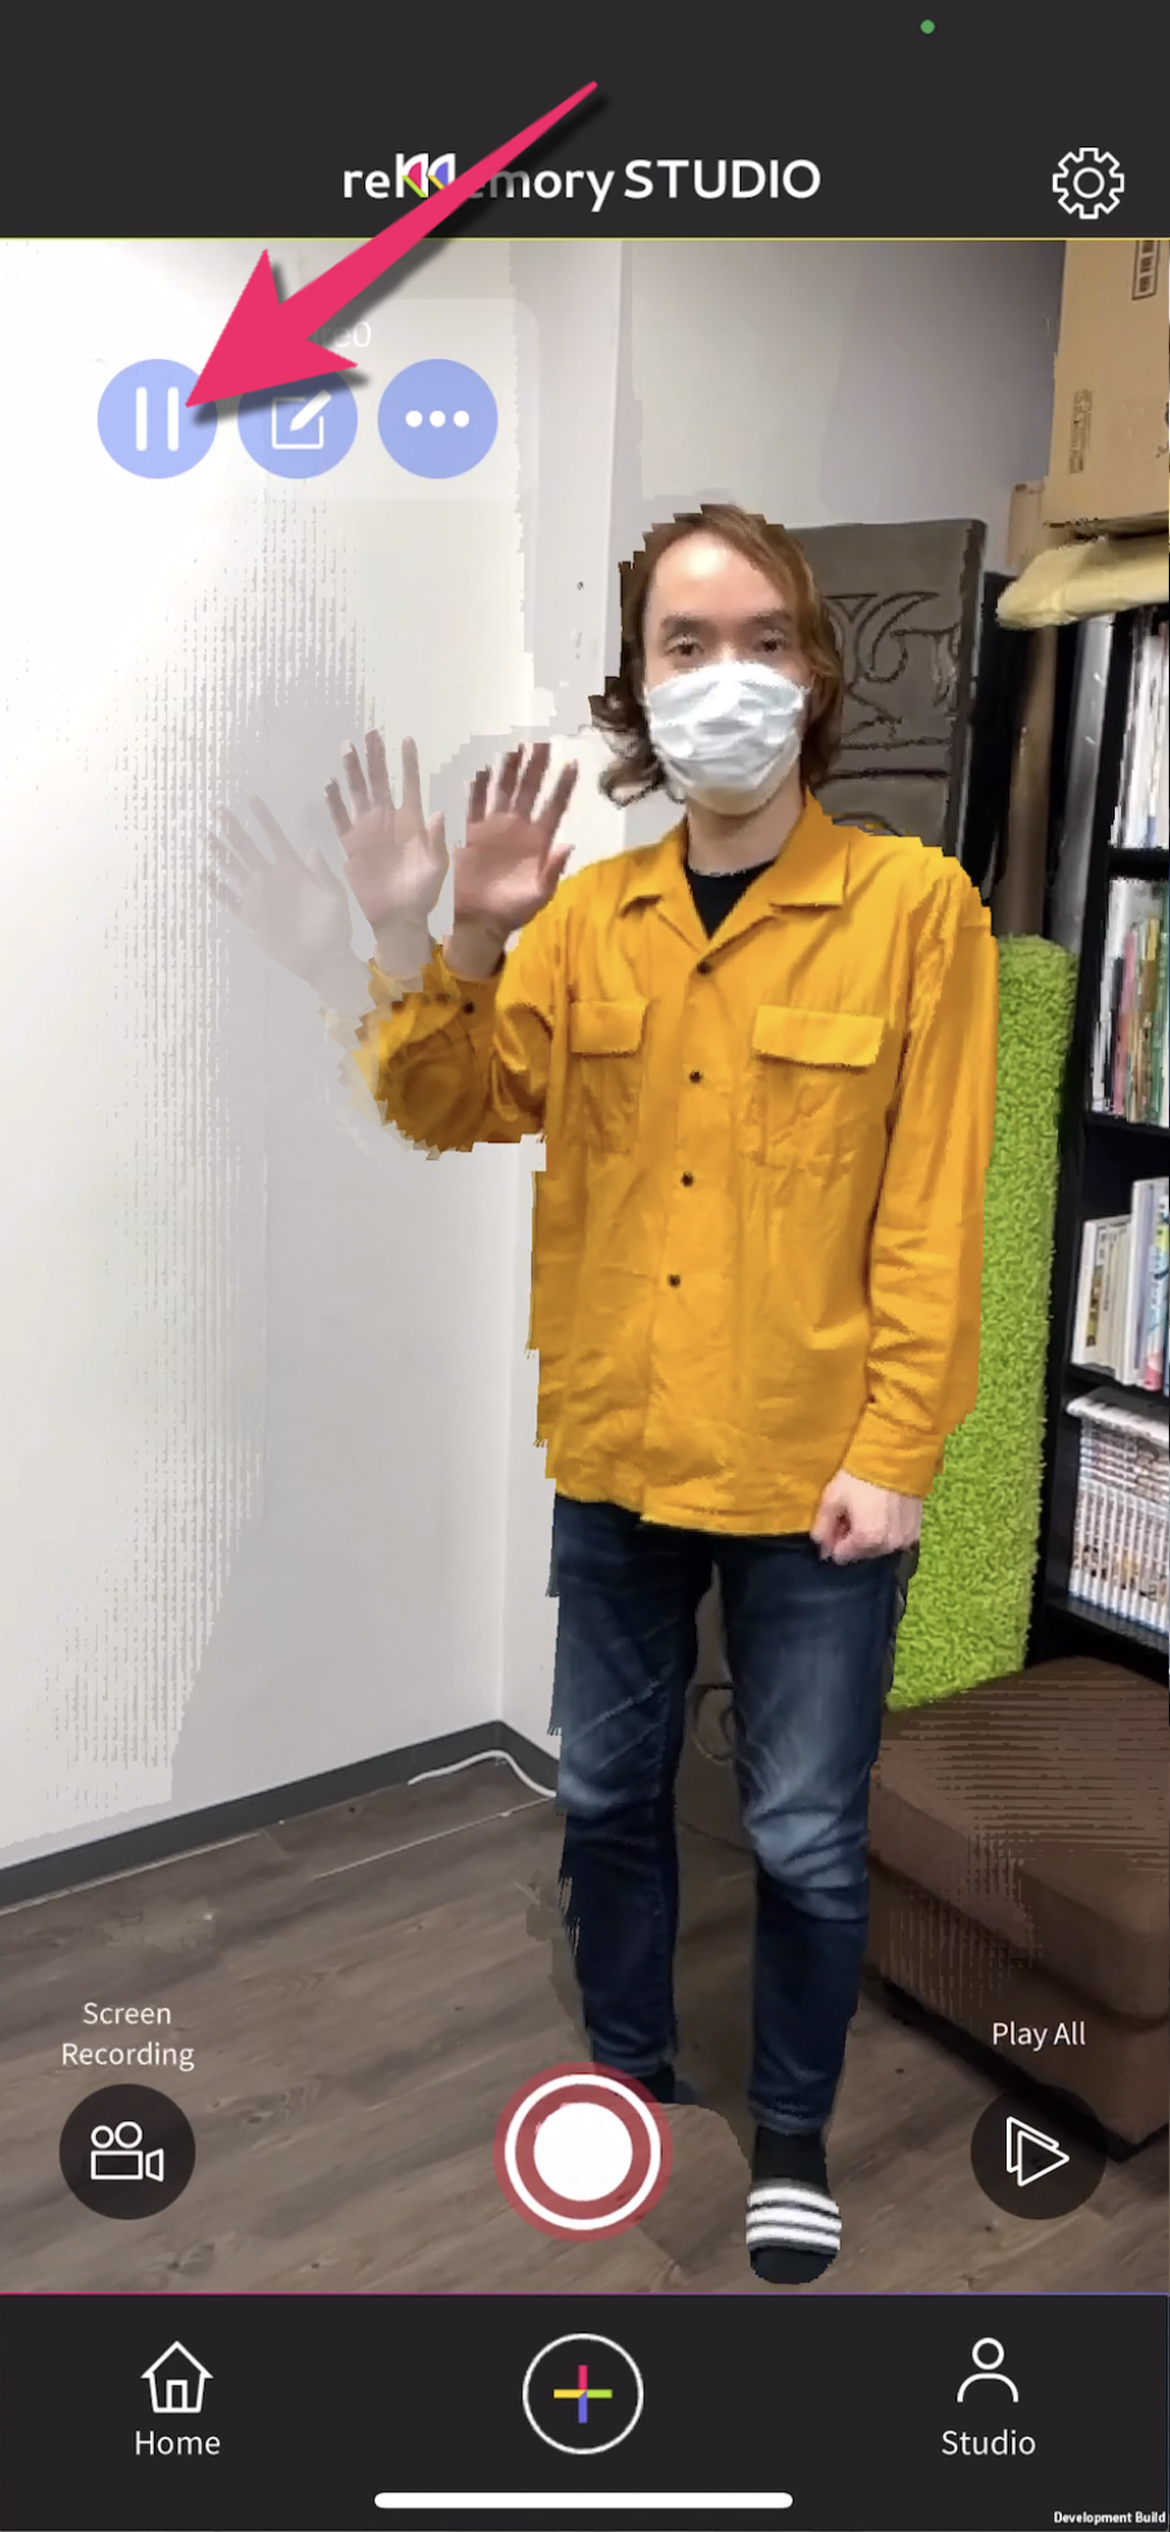
02. Play back the single captured data
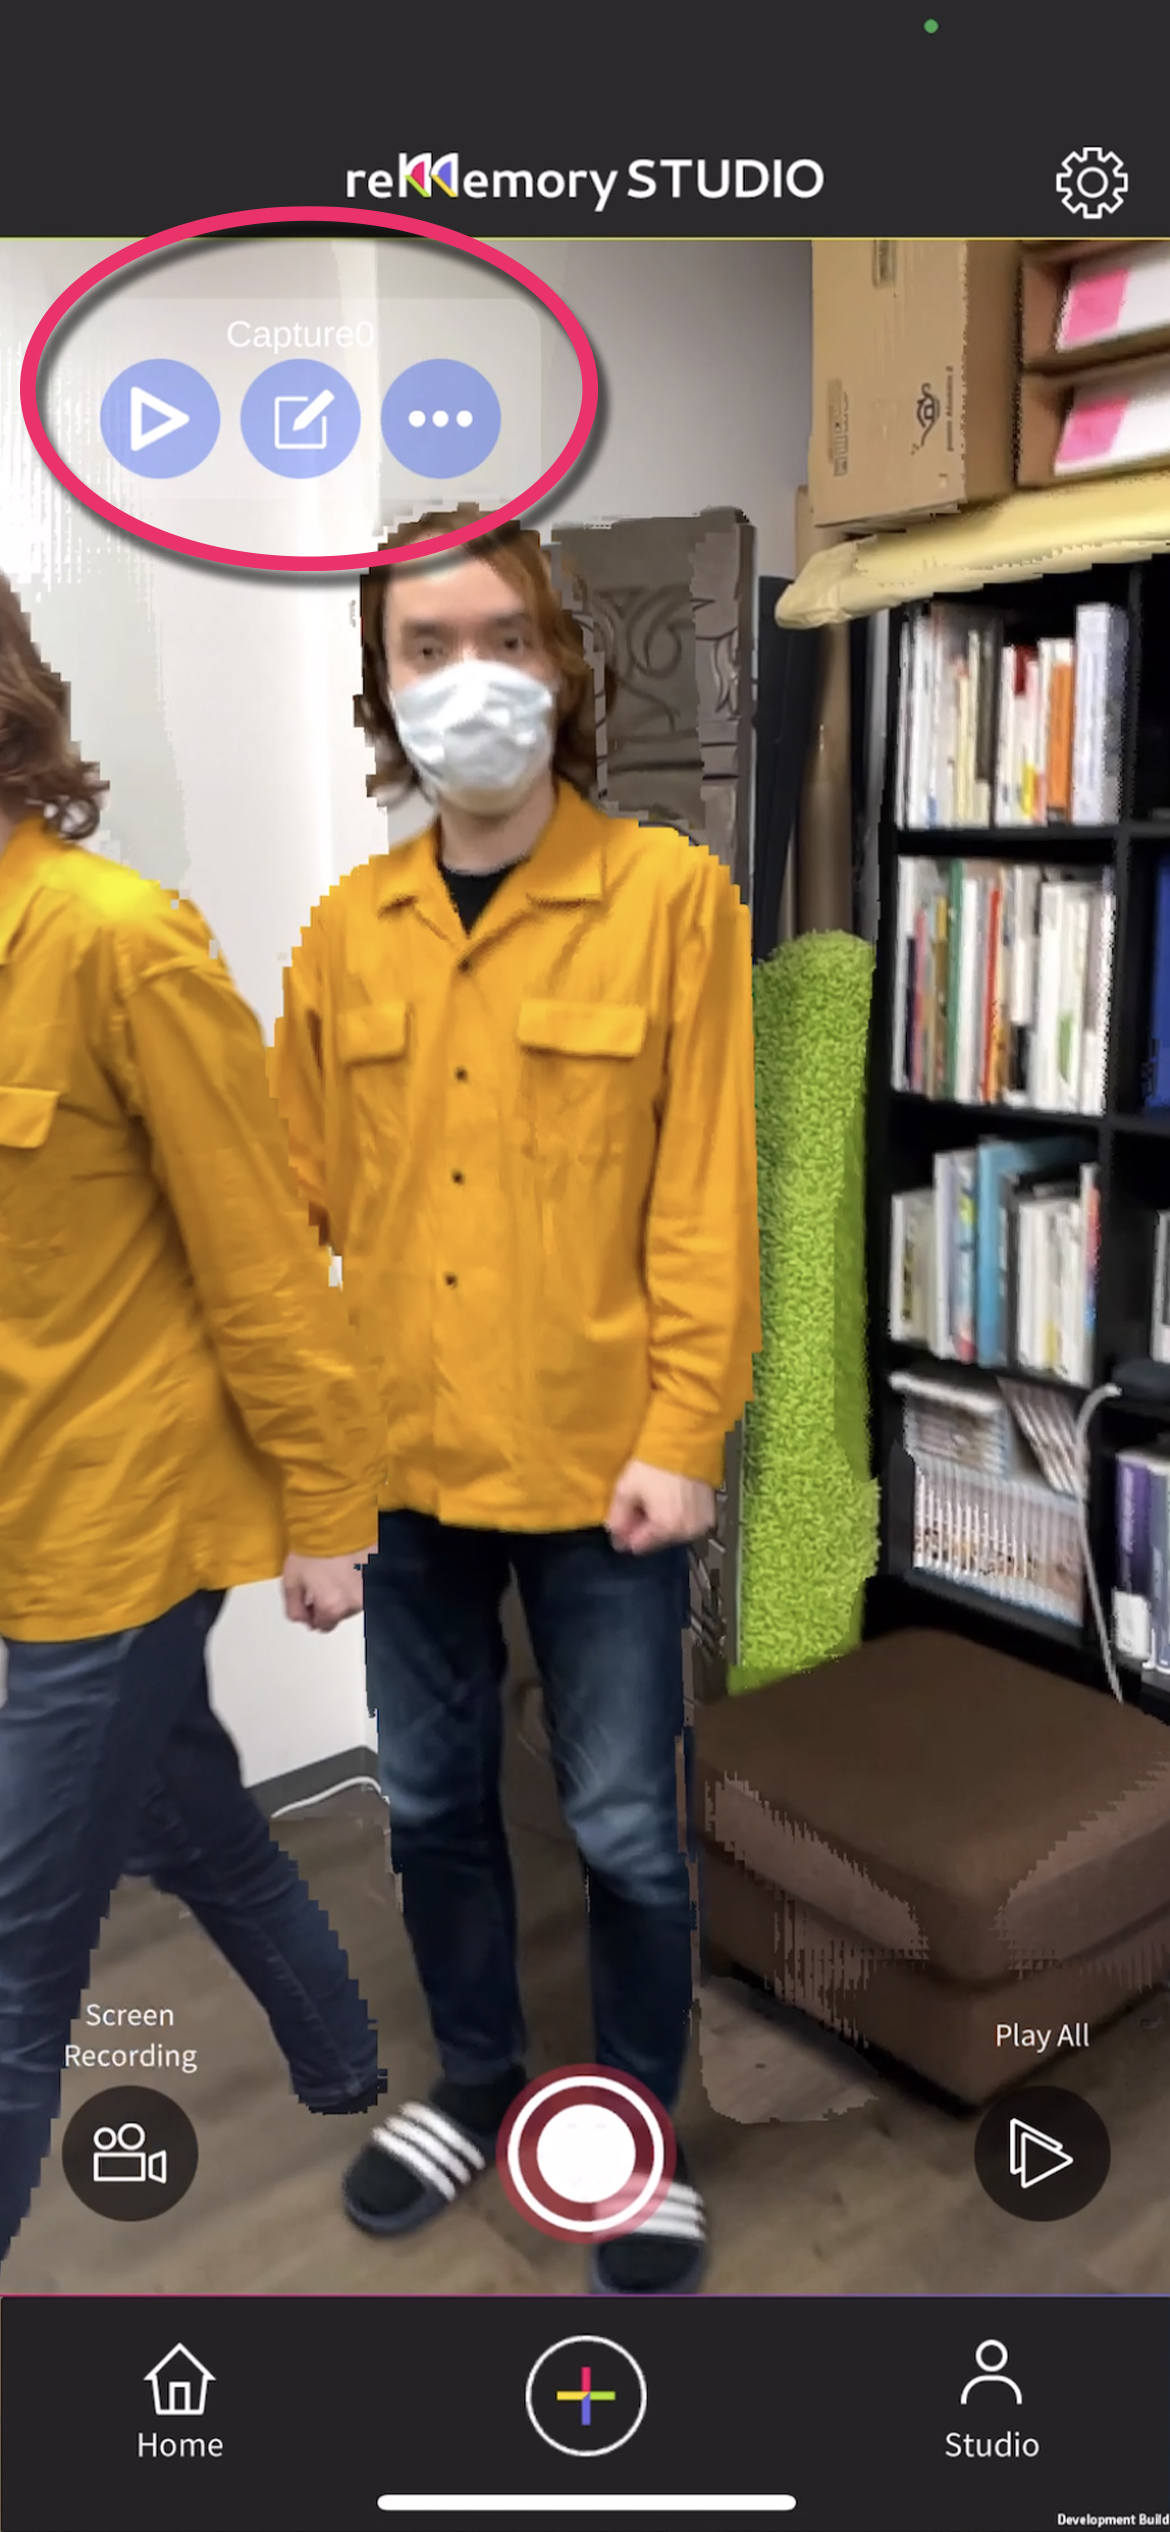
When the shooting is completed, the control panel for the captured 3D data will appear in the upper left corner of the screen. Press the Play button on the left side of this panel to play back the 3D data in AR.
03. Play all the data from multiple shots
You can also play back the AR by pressing the play button labeled "ALL" next to the shooting button at the bottom center of the screen. This ALL Playback button enables simultaneous playback when there are multiple 3D shooting data. When you want to play back individual 3D data, you can use the control panel for each data.
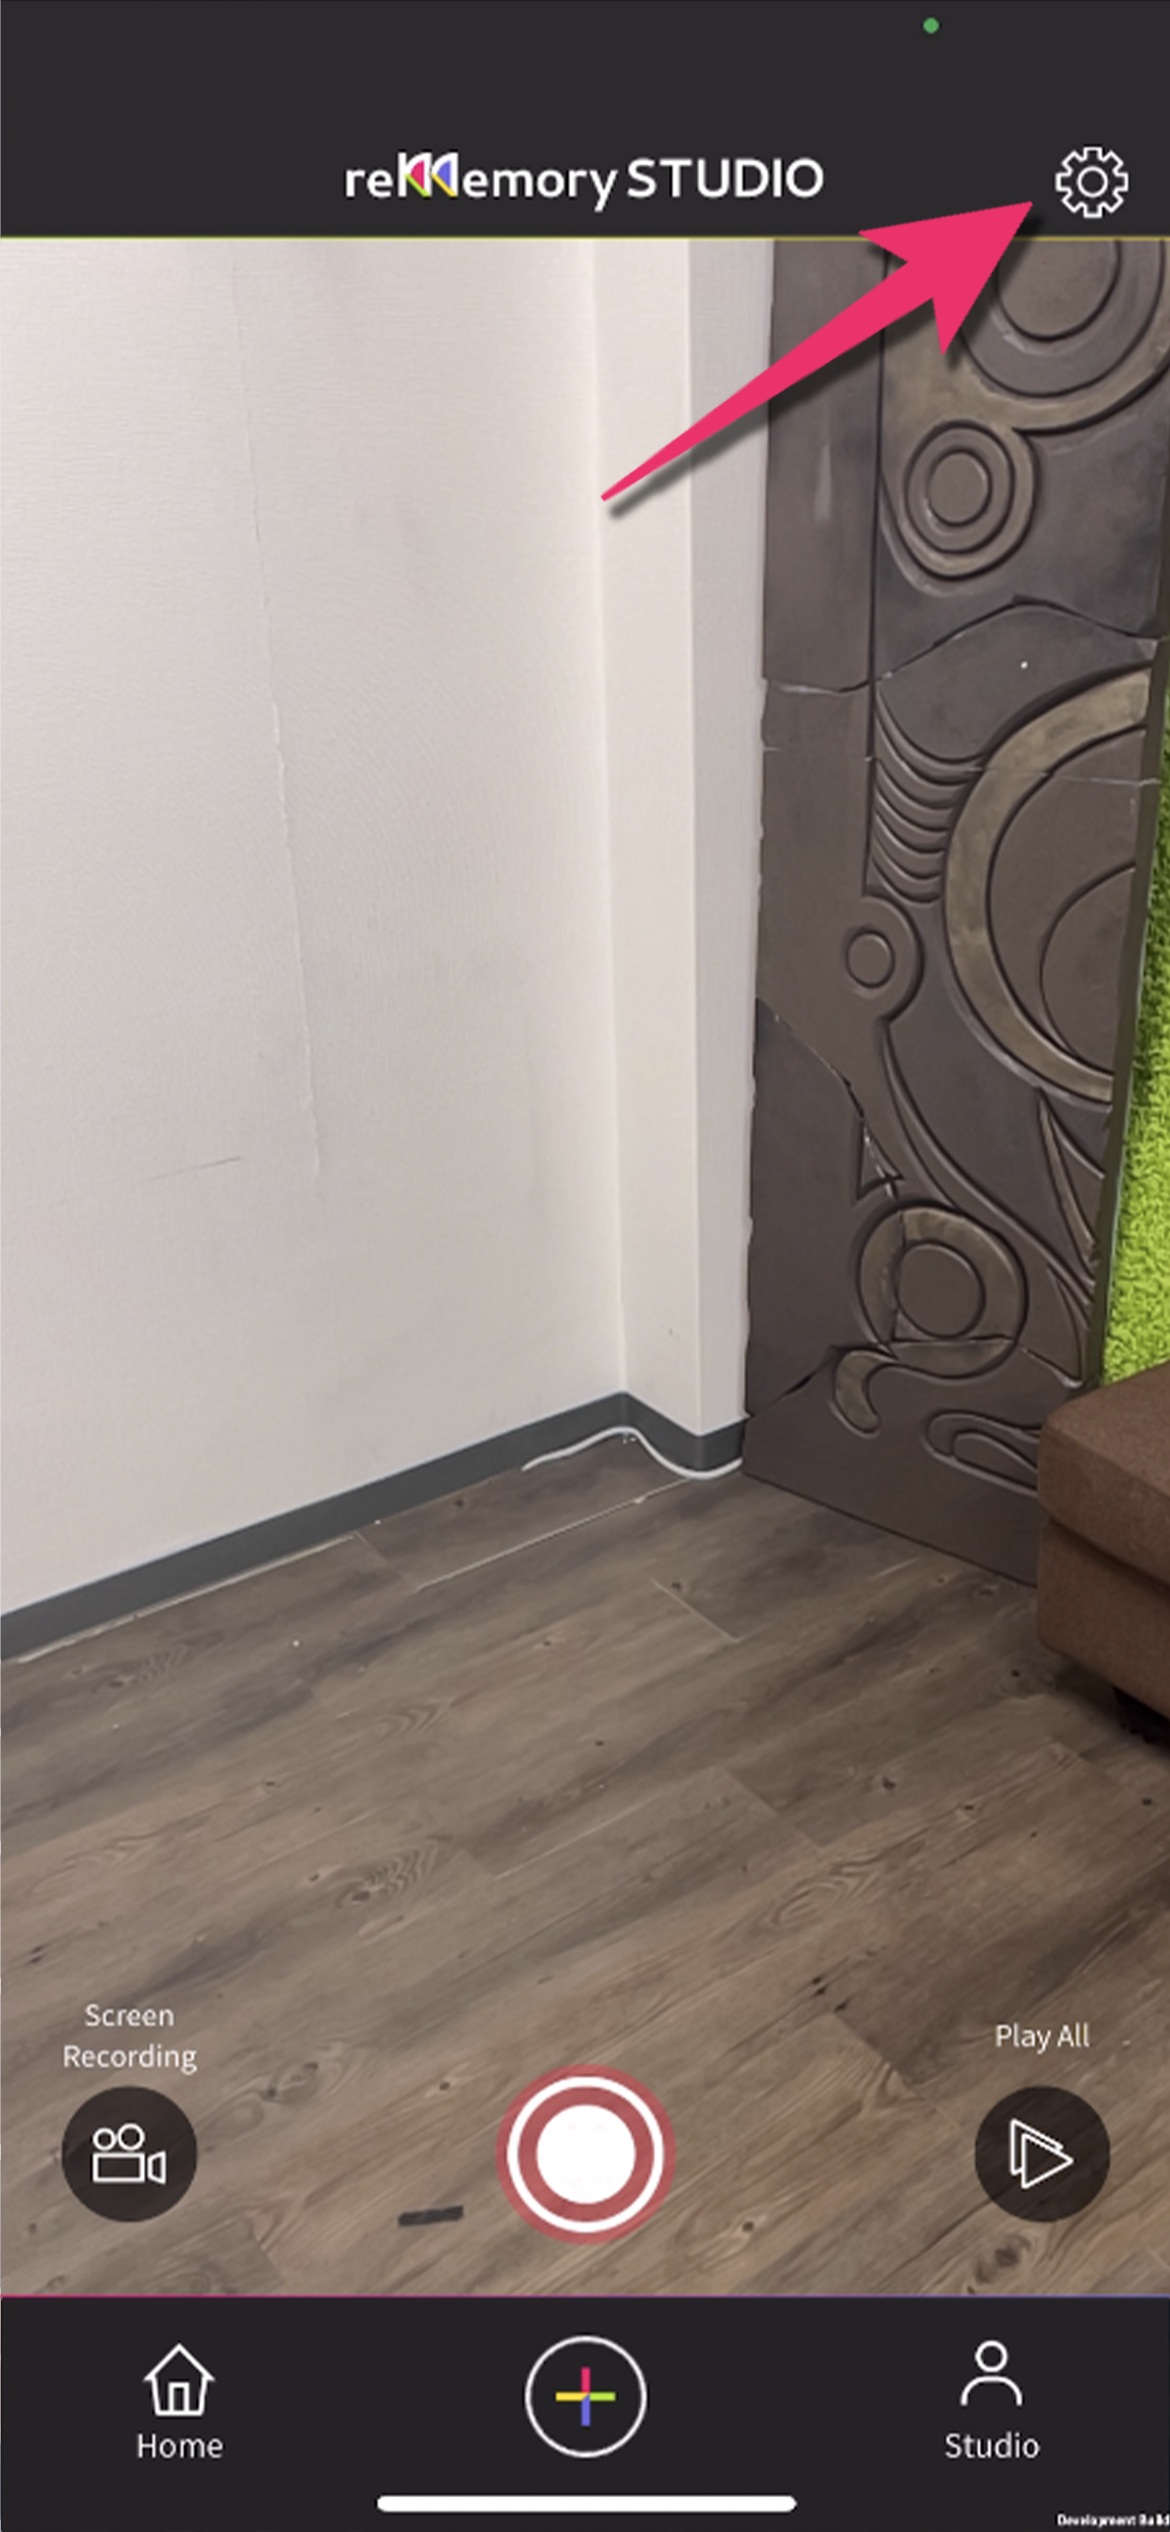
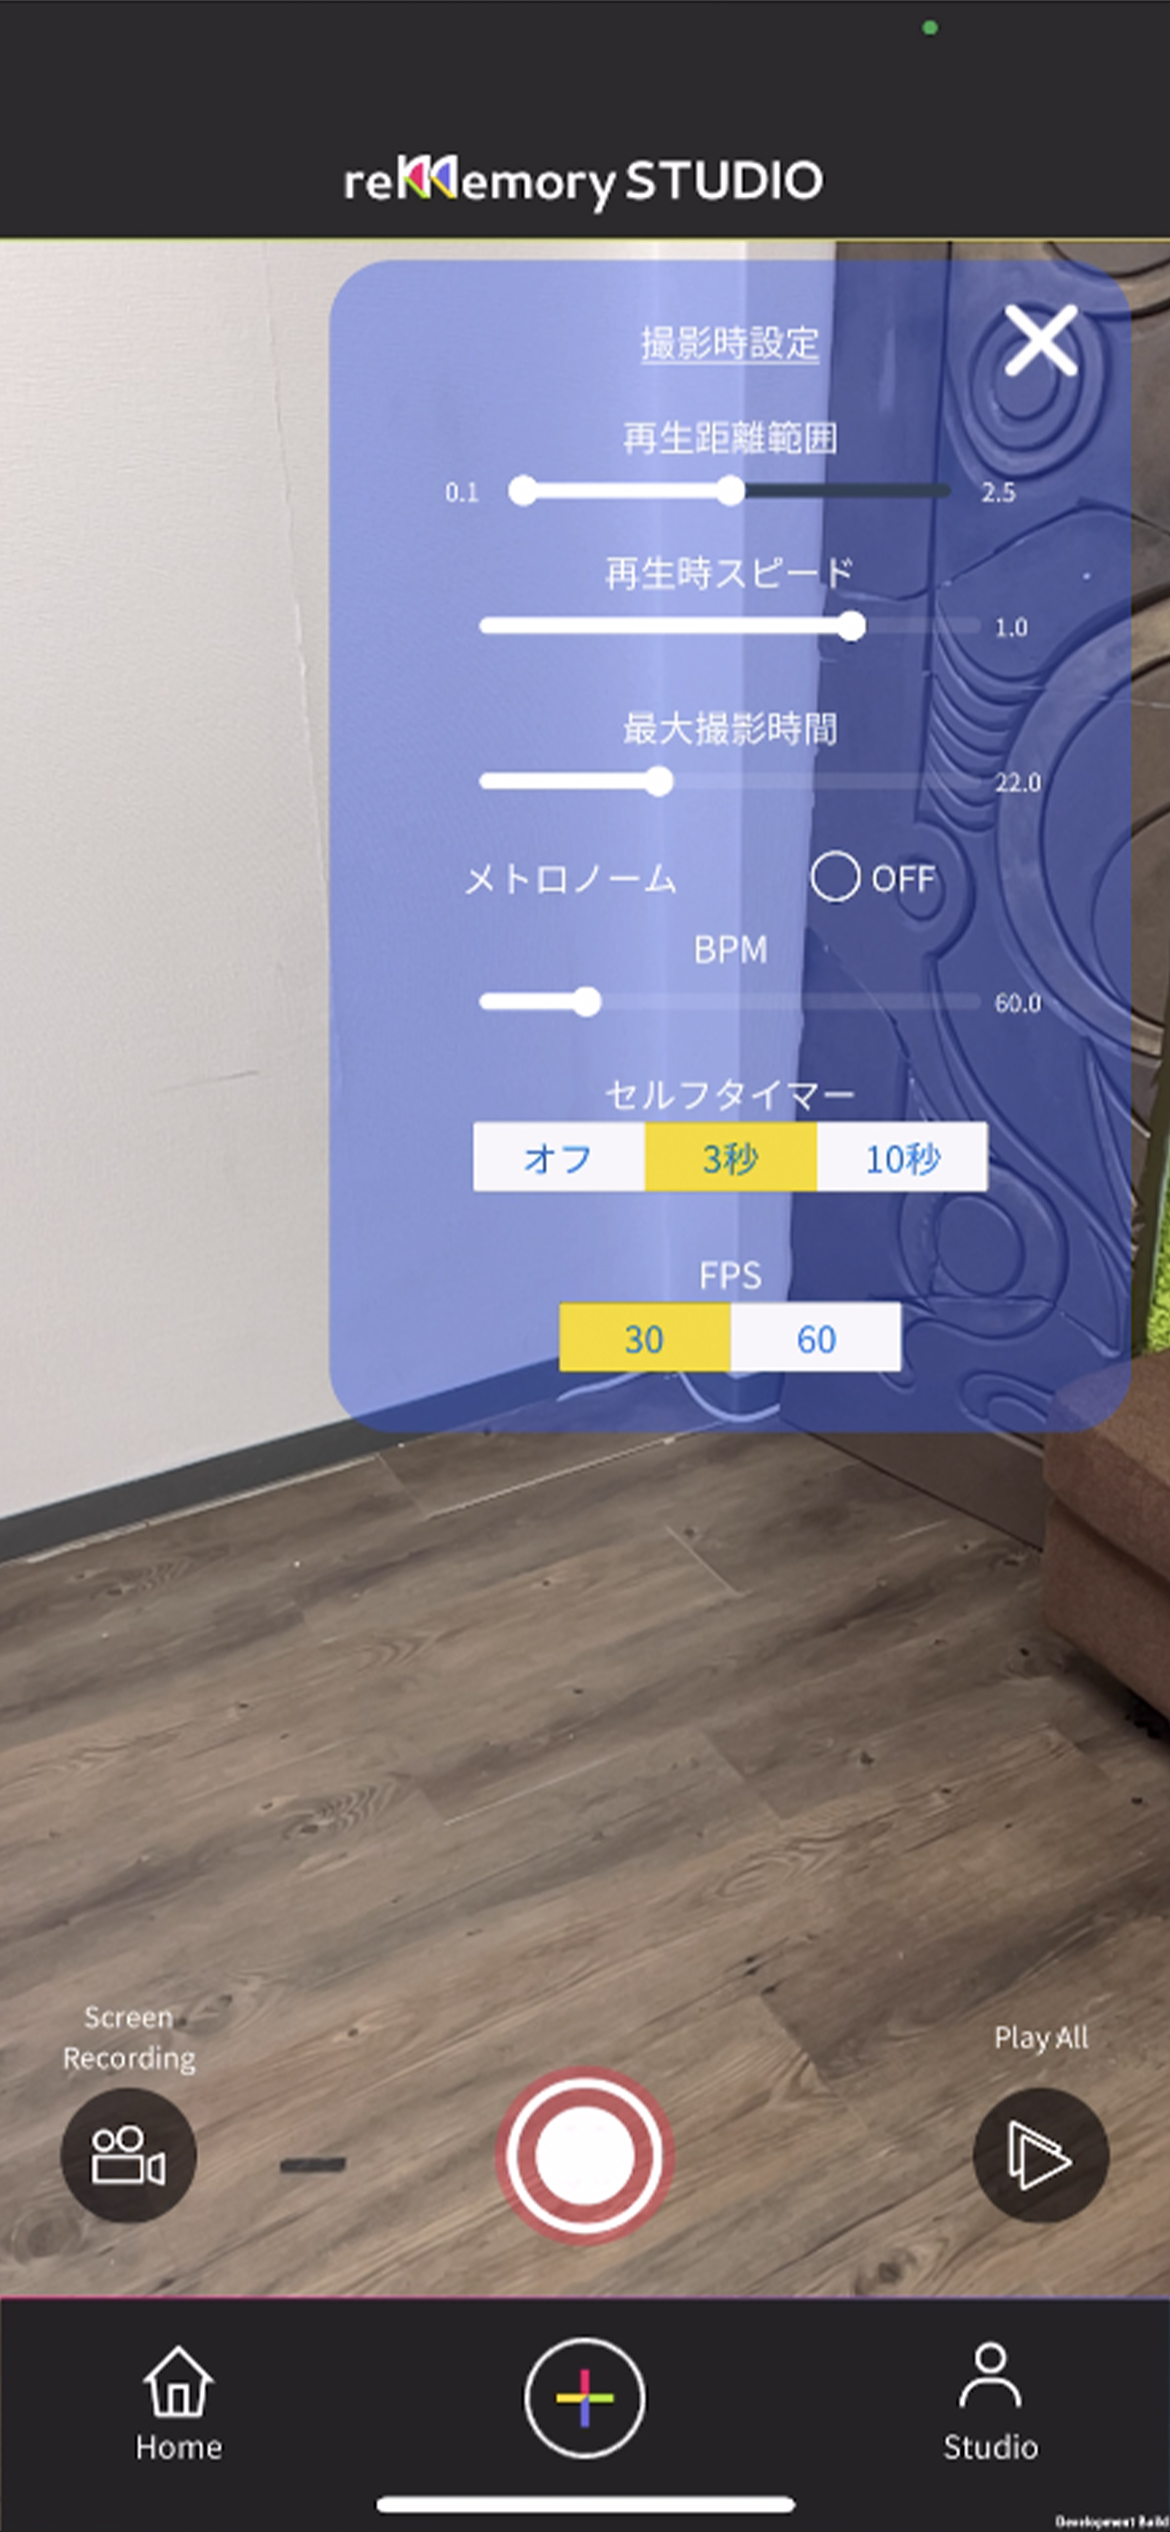
※Change settings for shooting
Click the gear icon in the upper right corner to change various settings for shooting. Clipping Distance … Specify the range of distance in meters of the captured 3D data to be played back. You can change it later. Speed … Specify the playback speed of the captured 3D data can range from -2x to +2x. You can change it later. Duration … Sets the maximum time for shooting in seconds. The camera will automatically stop shooting after this time has elapsed. Metronome … The metronome can be played at a specified BPM when shooting.
4. Let's edit the data you have taken.
You can edit each captured data by clicking the edit button on each capture. Use multiple editing methods to create your own original volumetric video.
Three-dimensional clipping
The space around the objects in the captured data can be clipped in depth, top, bottom, left, and right to make it easier to see. You can use it to remove unwanted walls or furniture, or to use only a part of the captured object.
Changing playback speed
Specify the playback speed of the captured 3D data can range from -2x to +2x.
Duplication and translation
You can duplicate the entire chapter you have shot and move it to the desired location by swiping.
Changing Scale
By pinching the screen with two fingers, you can scale up and down the captured data.
3. Share your volumetric videos
01. Choose your scene to upload
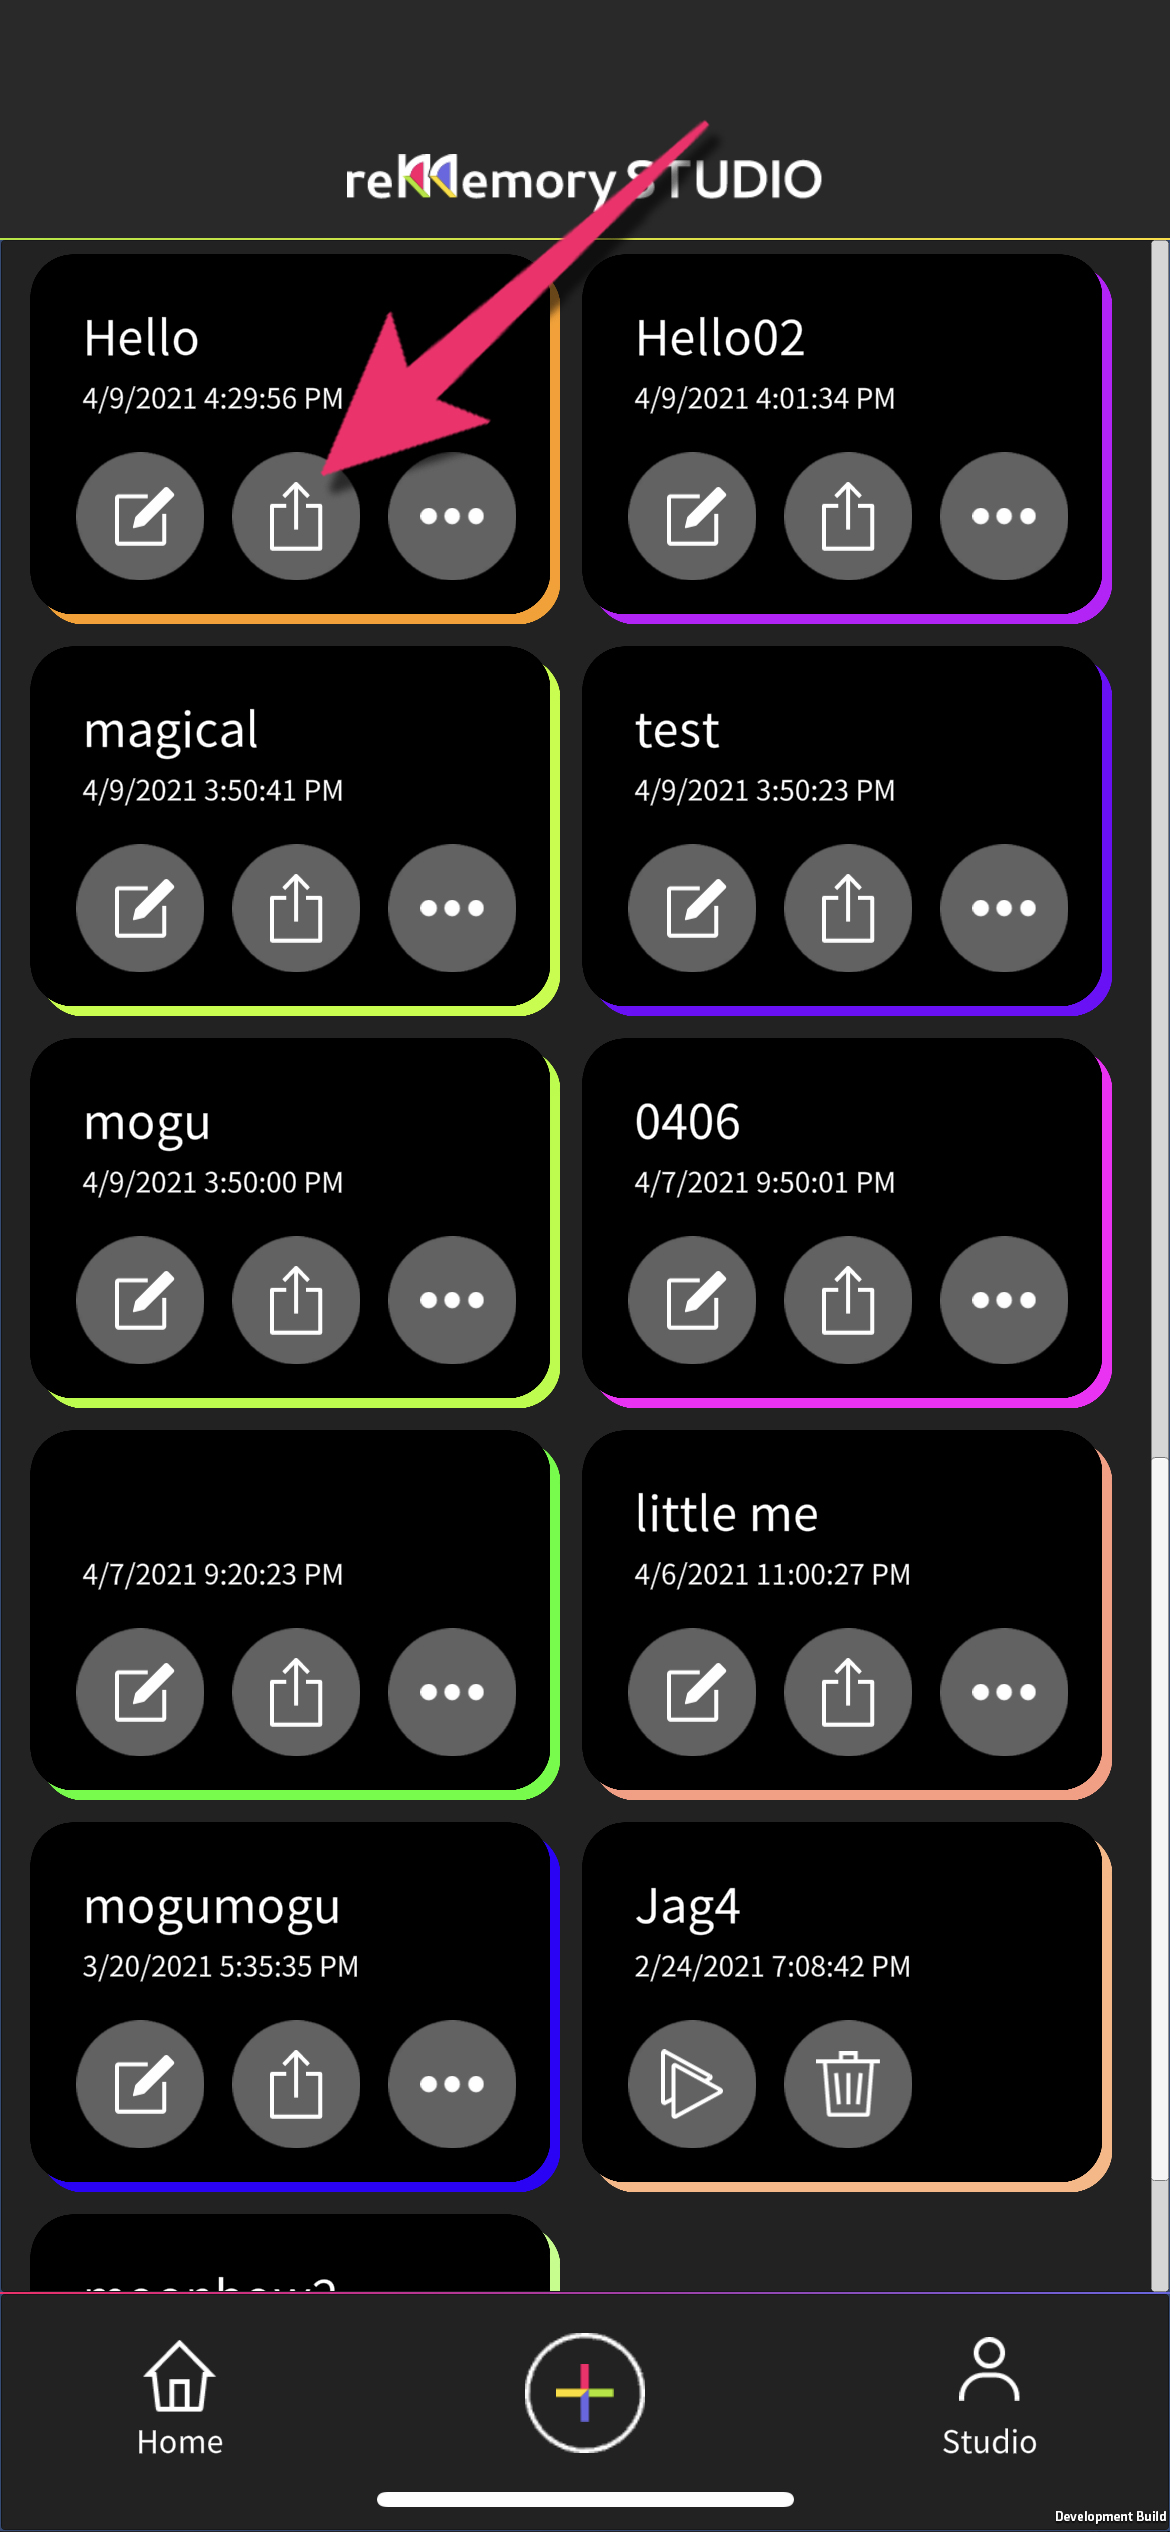
The scenes you create can be viewed by other users in AR using the Rememory app by using the share function. To share a scene, return to the top screen of the app and click the Share button of the scene you want to share.
02. Upload the data
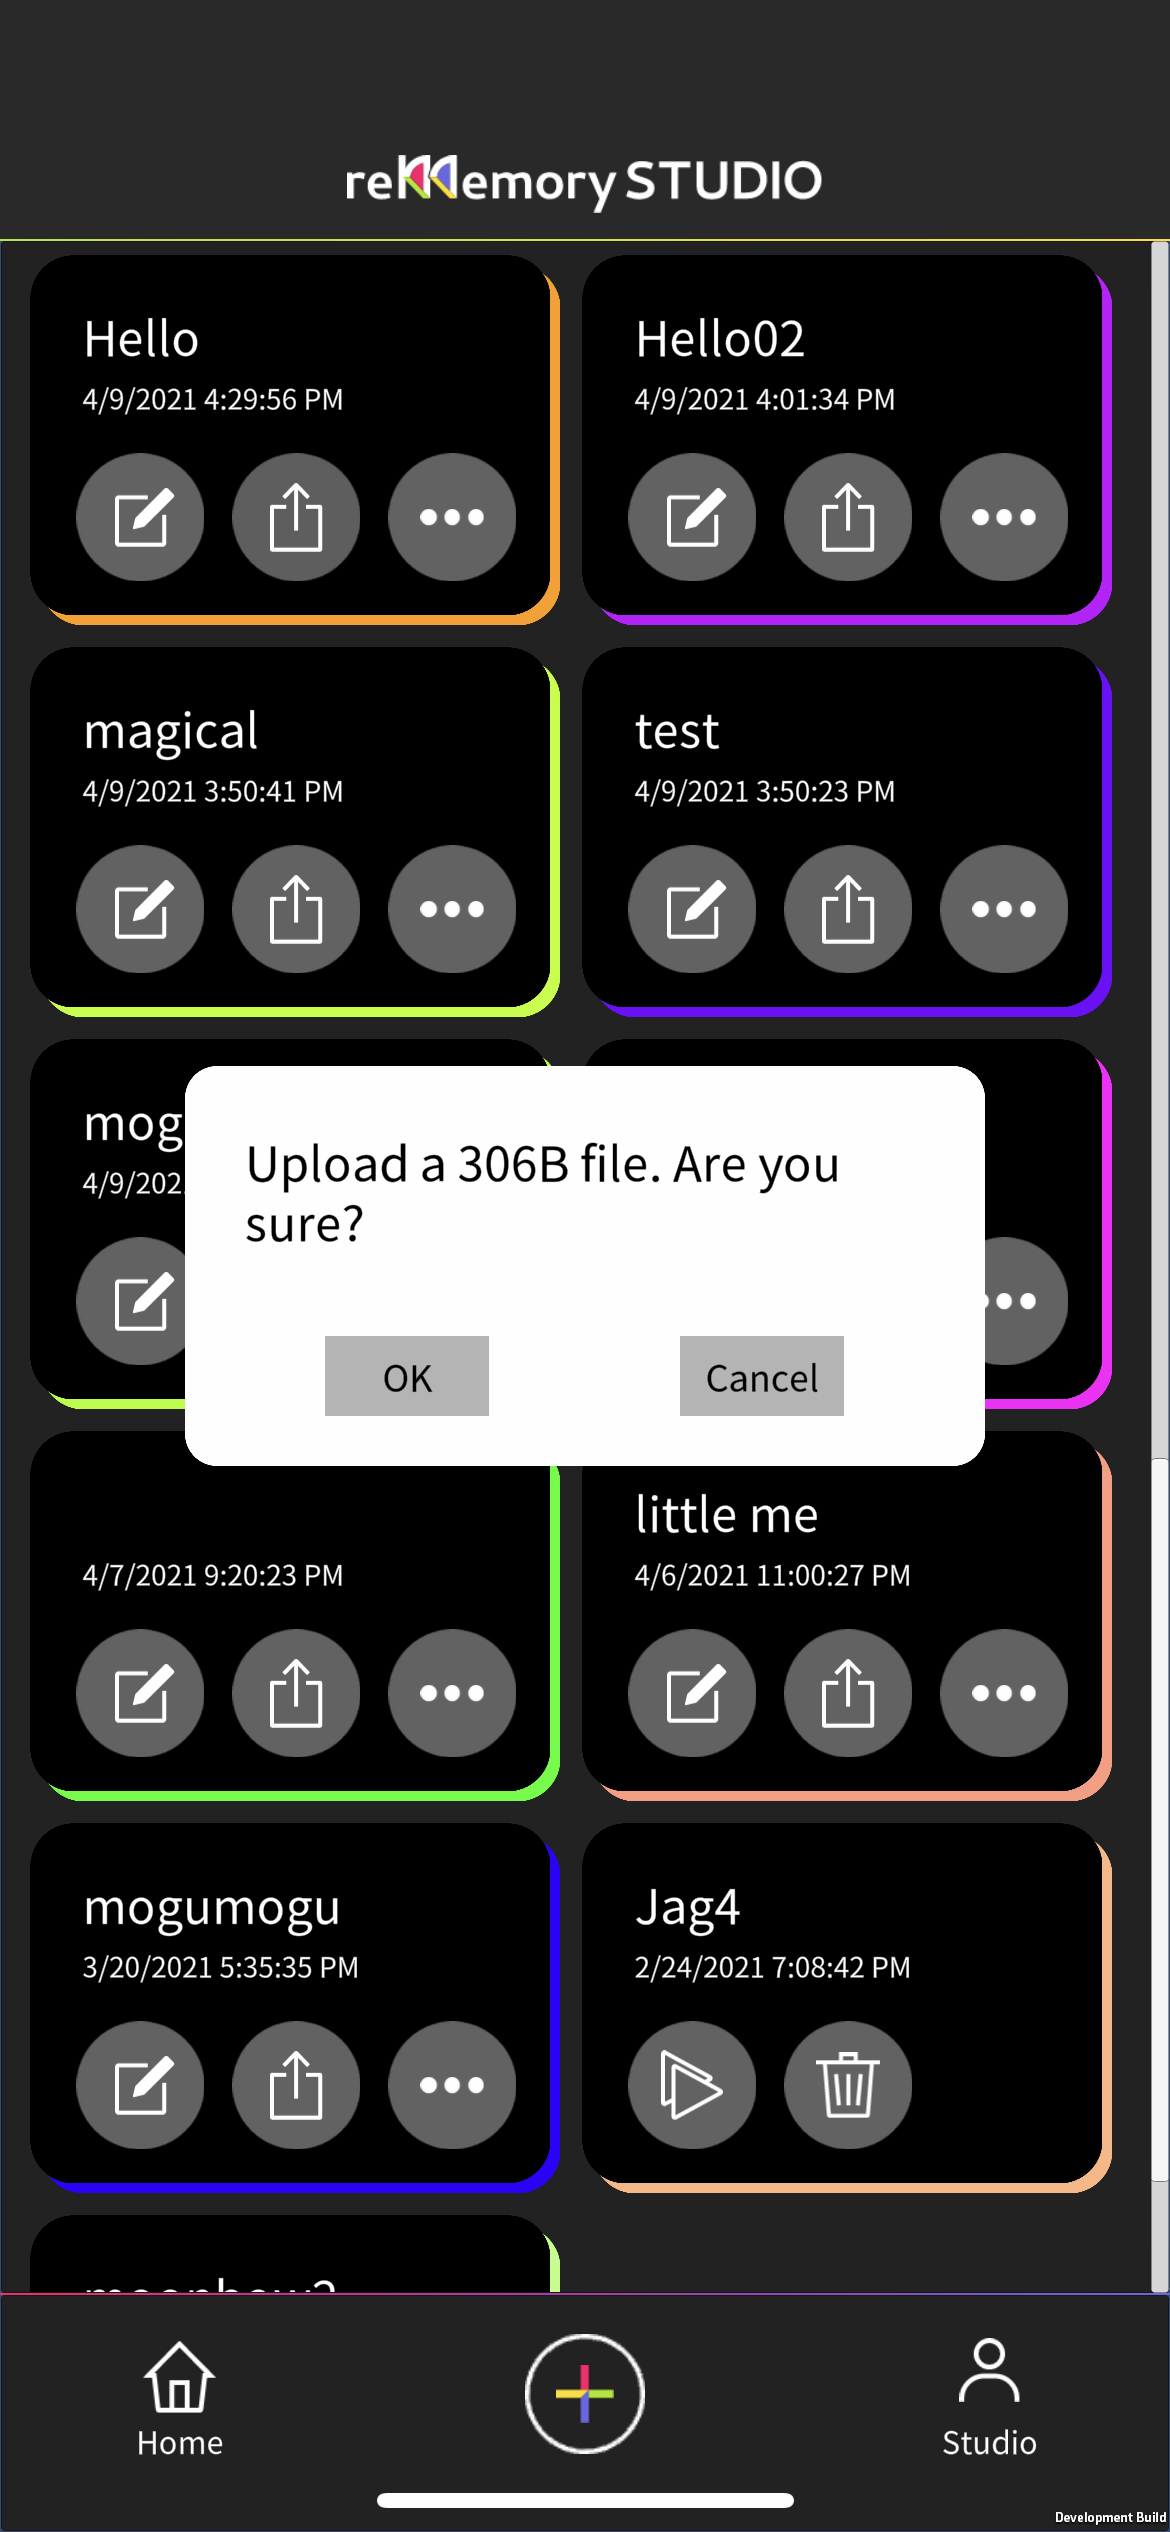
Click OK when a pop-up window appears to confirm the upload data size.
03. Share the published URL
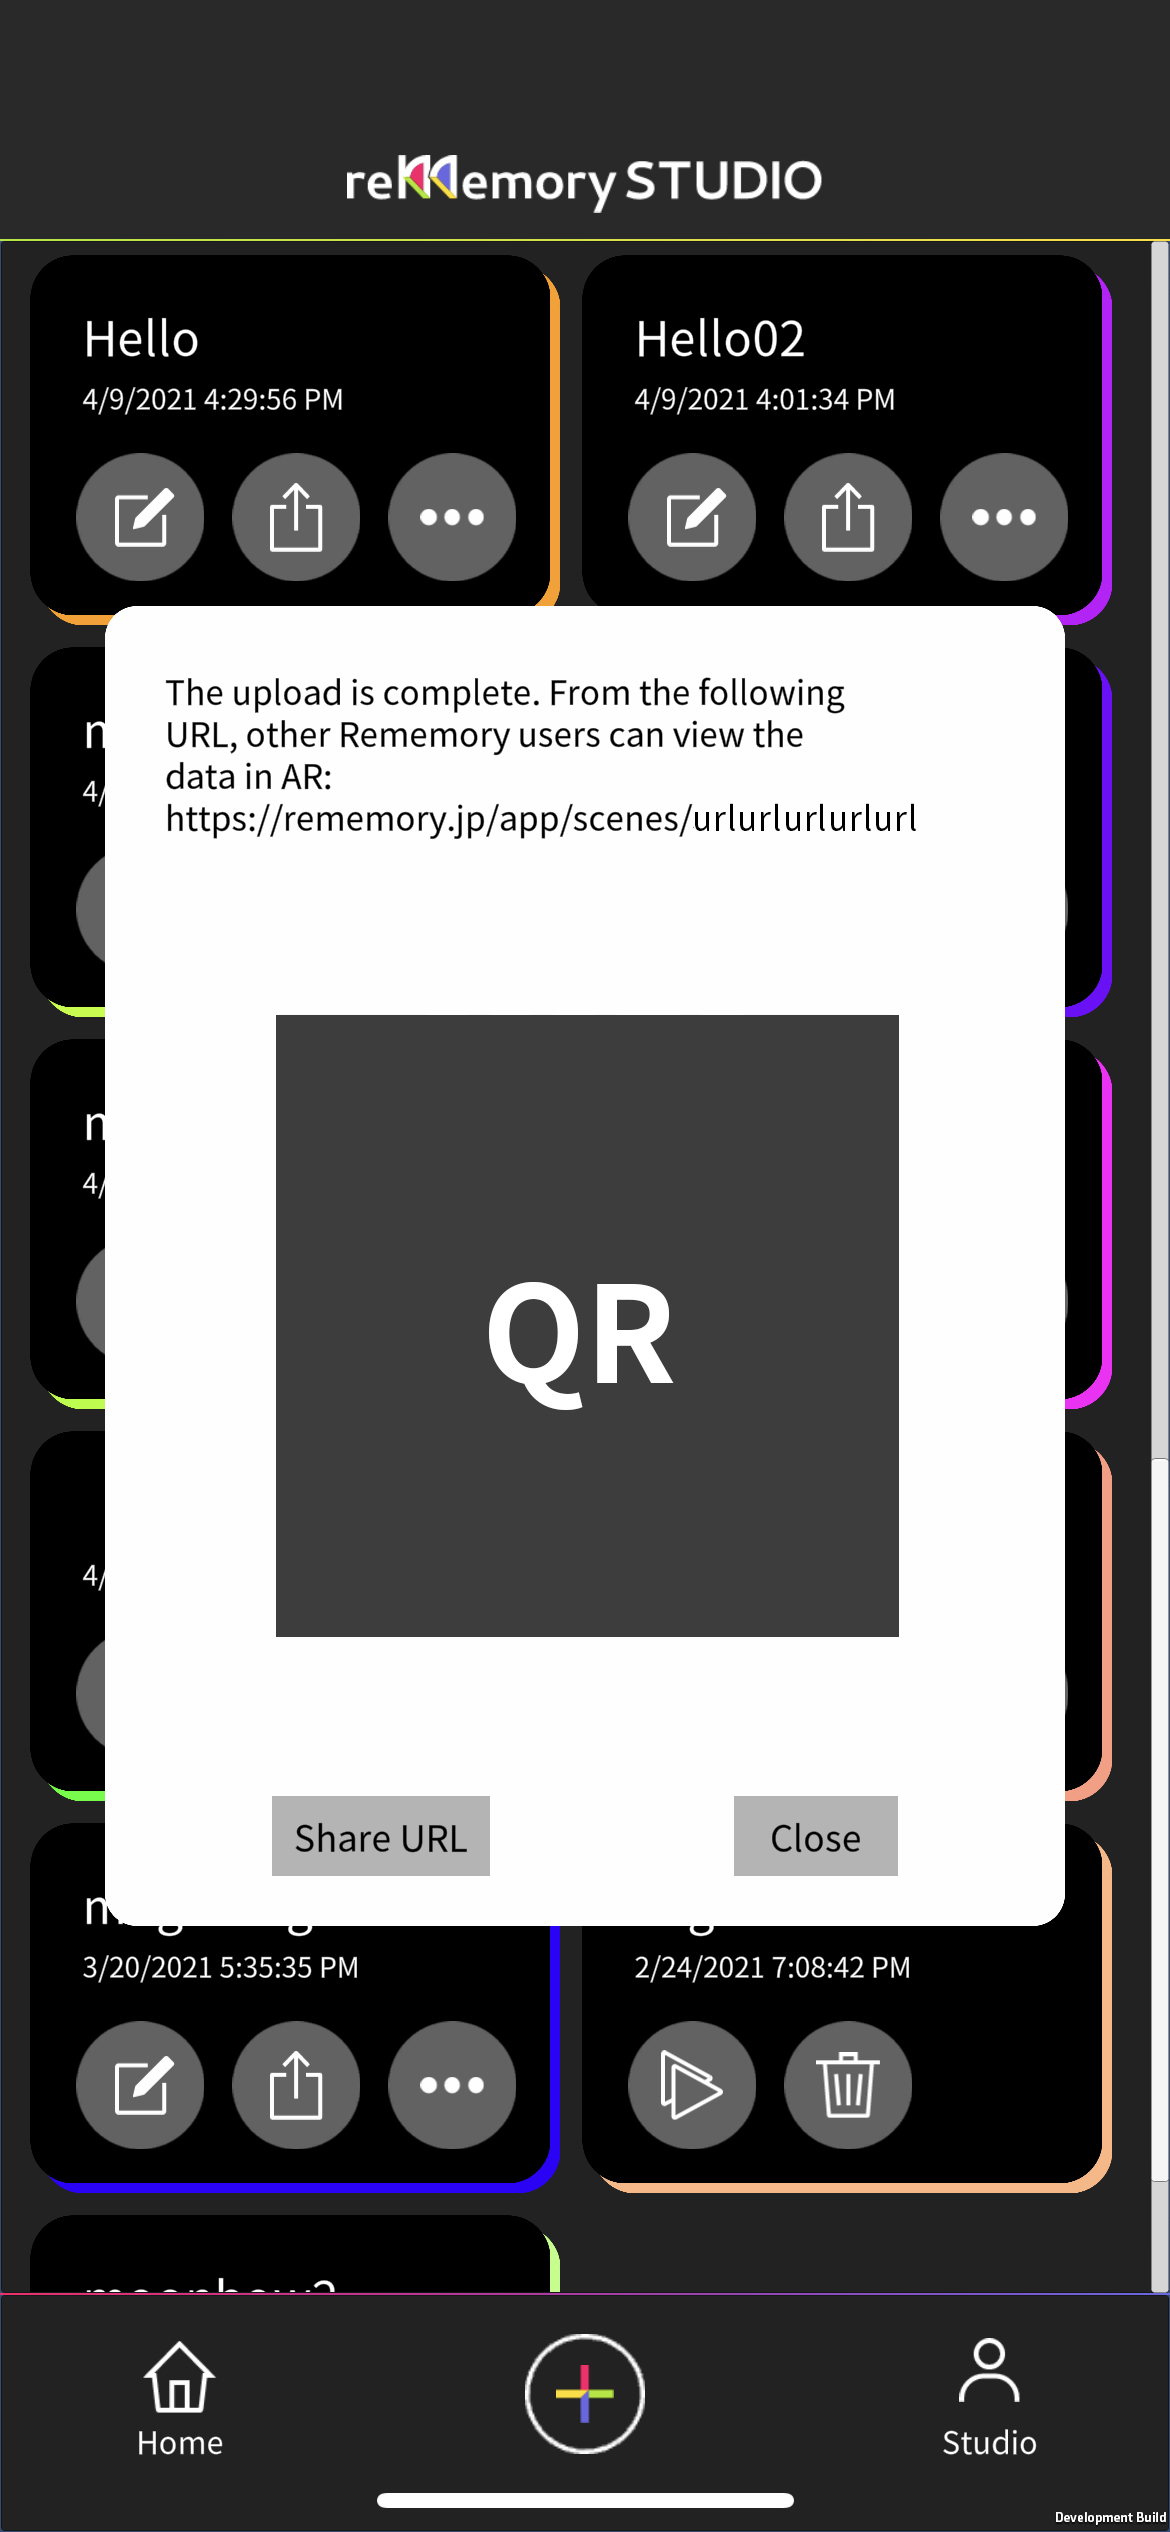
When the upload is complete, a URL for sharing will be displayed. Click the "Share URL" button to share the URL with other apps.
ボリュメトリックビデオは、 様々な角度から撮影することができます。
画面左下のスクリーン録画ボタンをクリックすると、現在再生しているARデータを2Dのビデオとして録画できます
シーンの撮影は、LiDAR以外の端末でも利用可能です
自分で撮影・編集したコンテンツはもちろん、 撮影非対応端末であってもマイスタジオに格納できるコンテンツであれば、視聴・スクリーン録画することが可能です。
※まだマイスタジオにデータがない場合中央左下の「Home」からコンテンツを選んでダウンロードすることができます。
1.準備:ビデオ撮影したいコンテンツを再生しよう
01.コンテンツを選ぼう
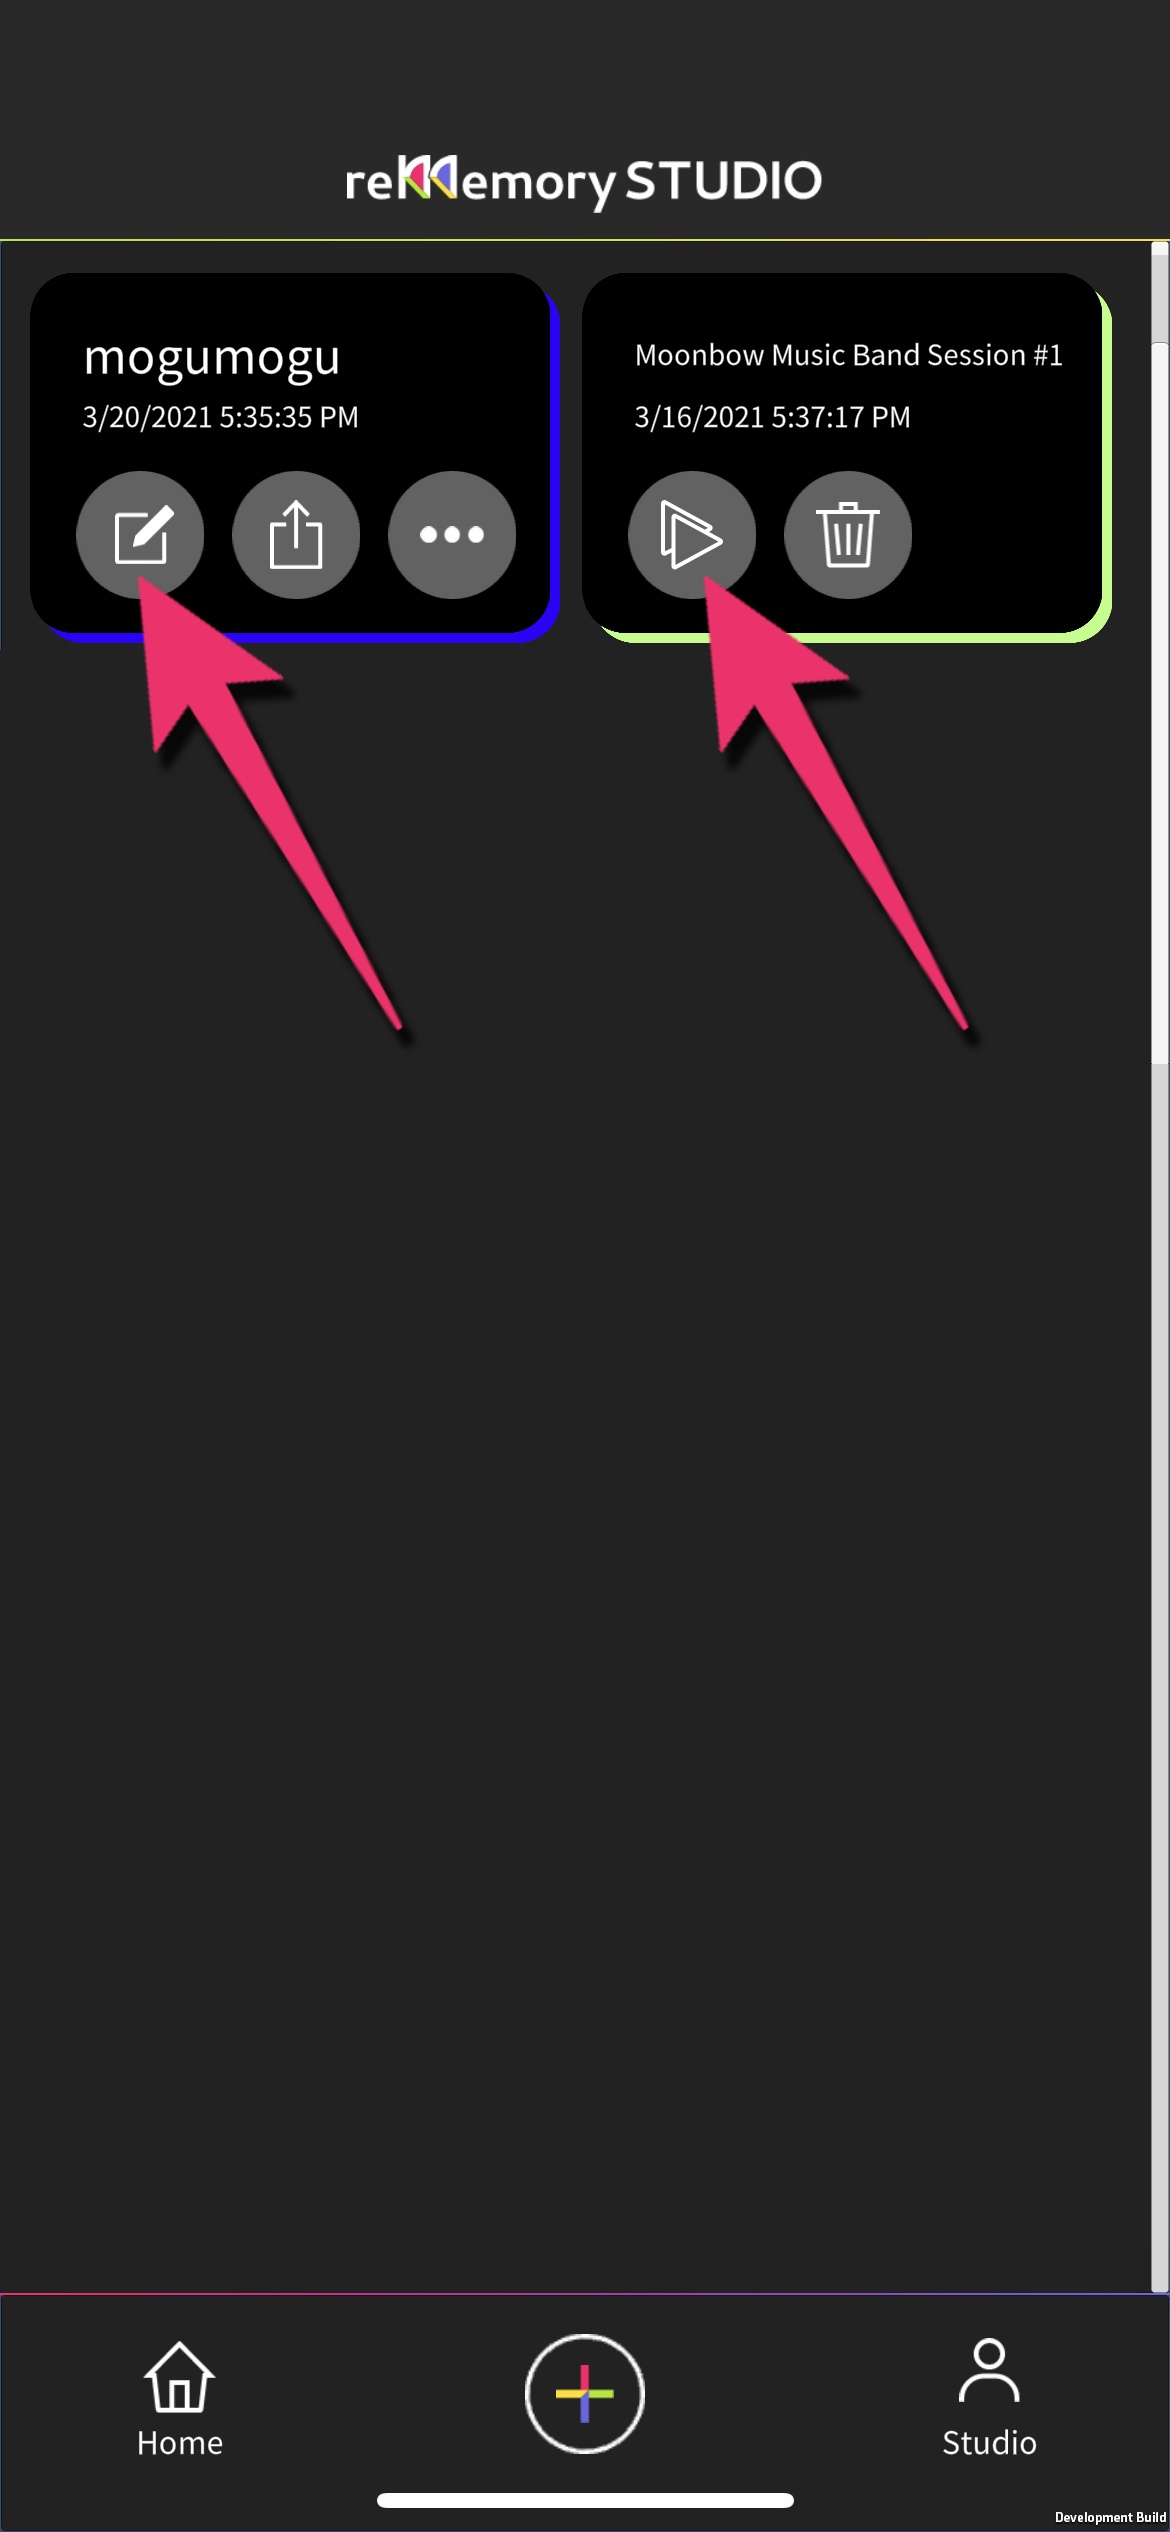
マイスタジオに格納されているコンテンツを選びましょう。 自分で作成したコンテンツの場合は「編集」、 公式または友人知人から共有されたコンテンツは「再生」をタップしてください。
02.コンテンツを配置しよう
視聴や撮影と同じように、シーンの基準位置を決めてコンテンツを配置しましょう。 詳しい配置方法は「撮影方法」または「視聴方法」をご確認ください。
03.コンテンツを再生しよう
右下の「すべて再生」ボタンからコンテンツに含まれている全てのシーンを再生できます。
2. Take video of volumetrics at any angle you like!
01. Tap the video icon
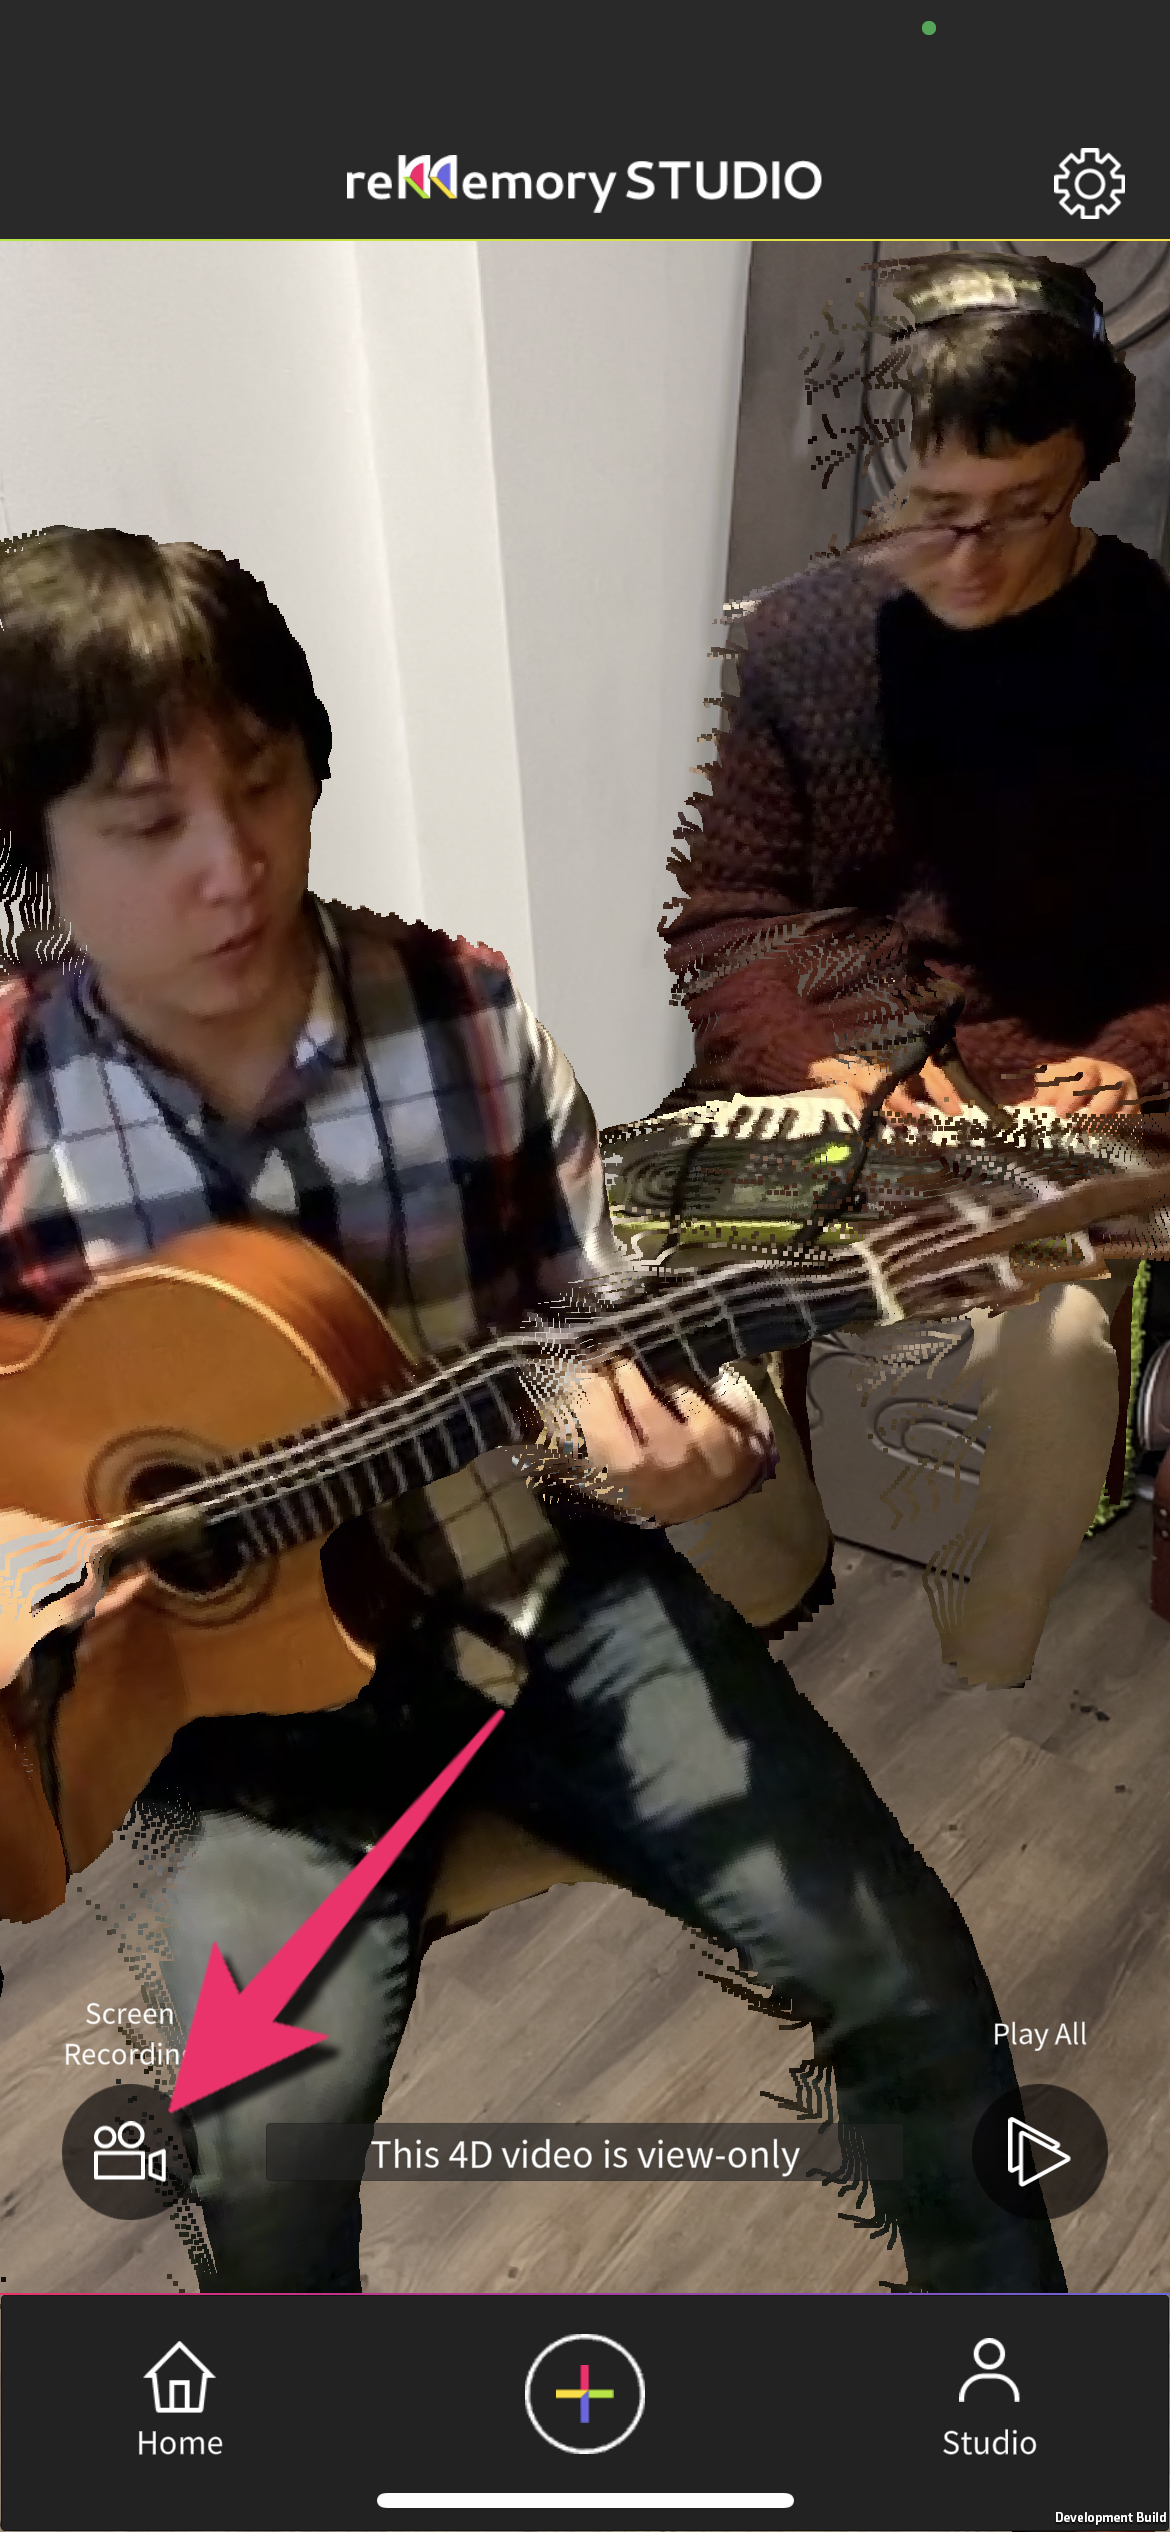
Tap the video icon in the lower left corner to start recording. Tap it again to finish recording.
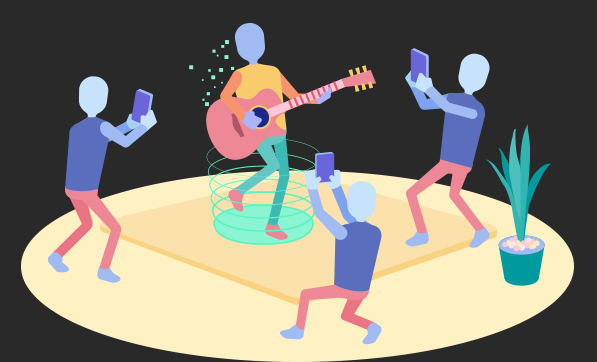
You can take a picture of yourself with it.
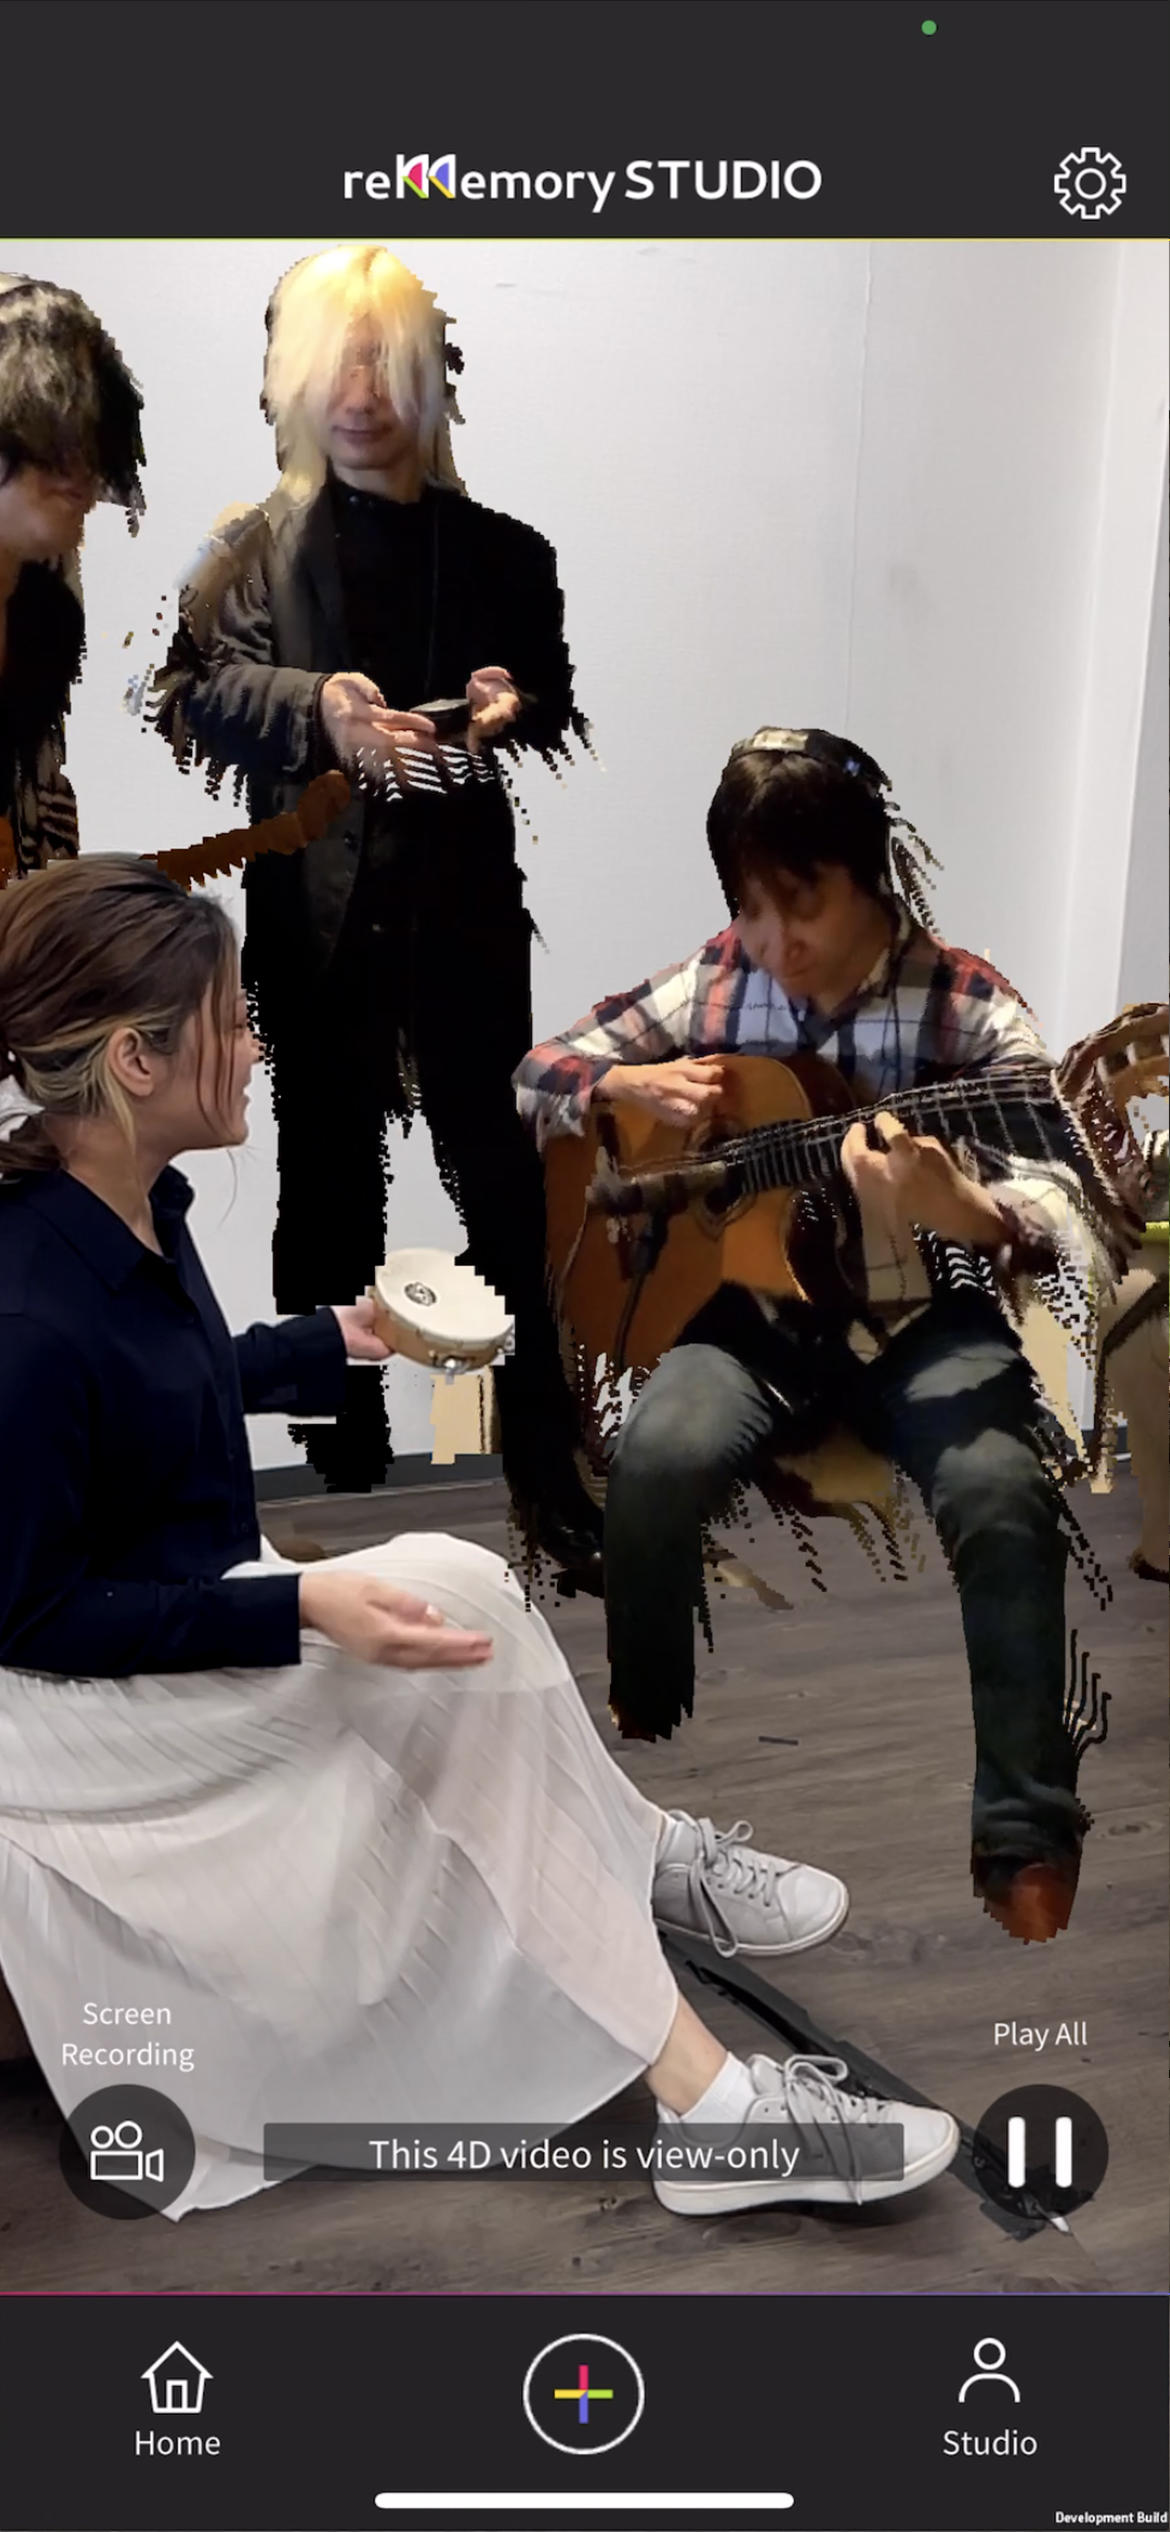
Not only can you film the content, but you can also enter the real you and film together. Let's create fun videos with various ideas.
02. Save and share!
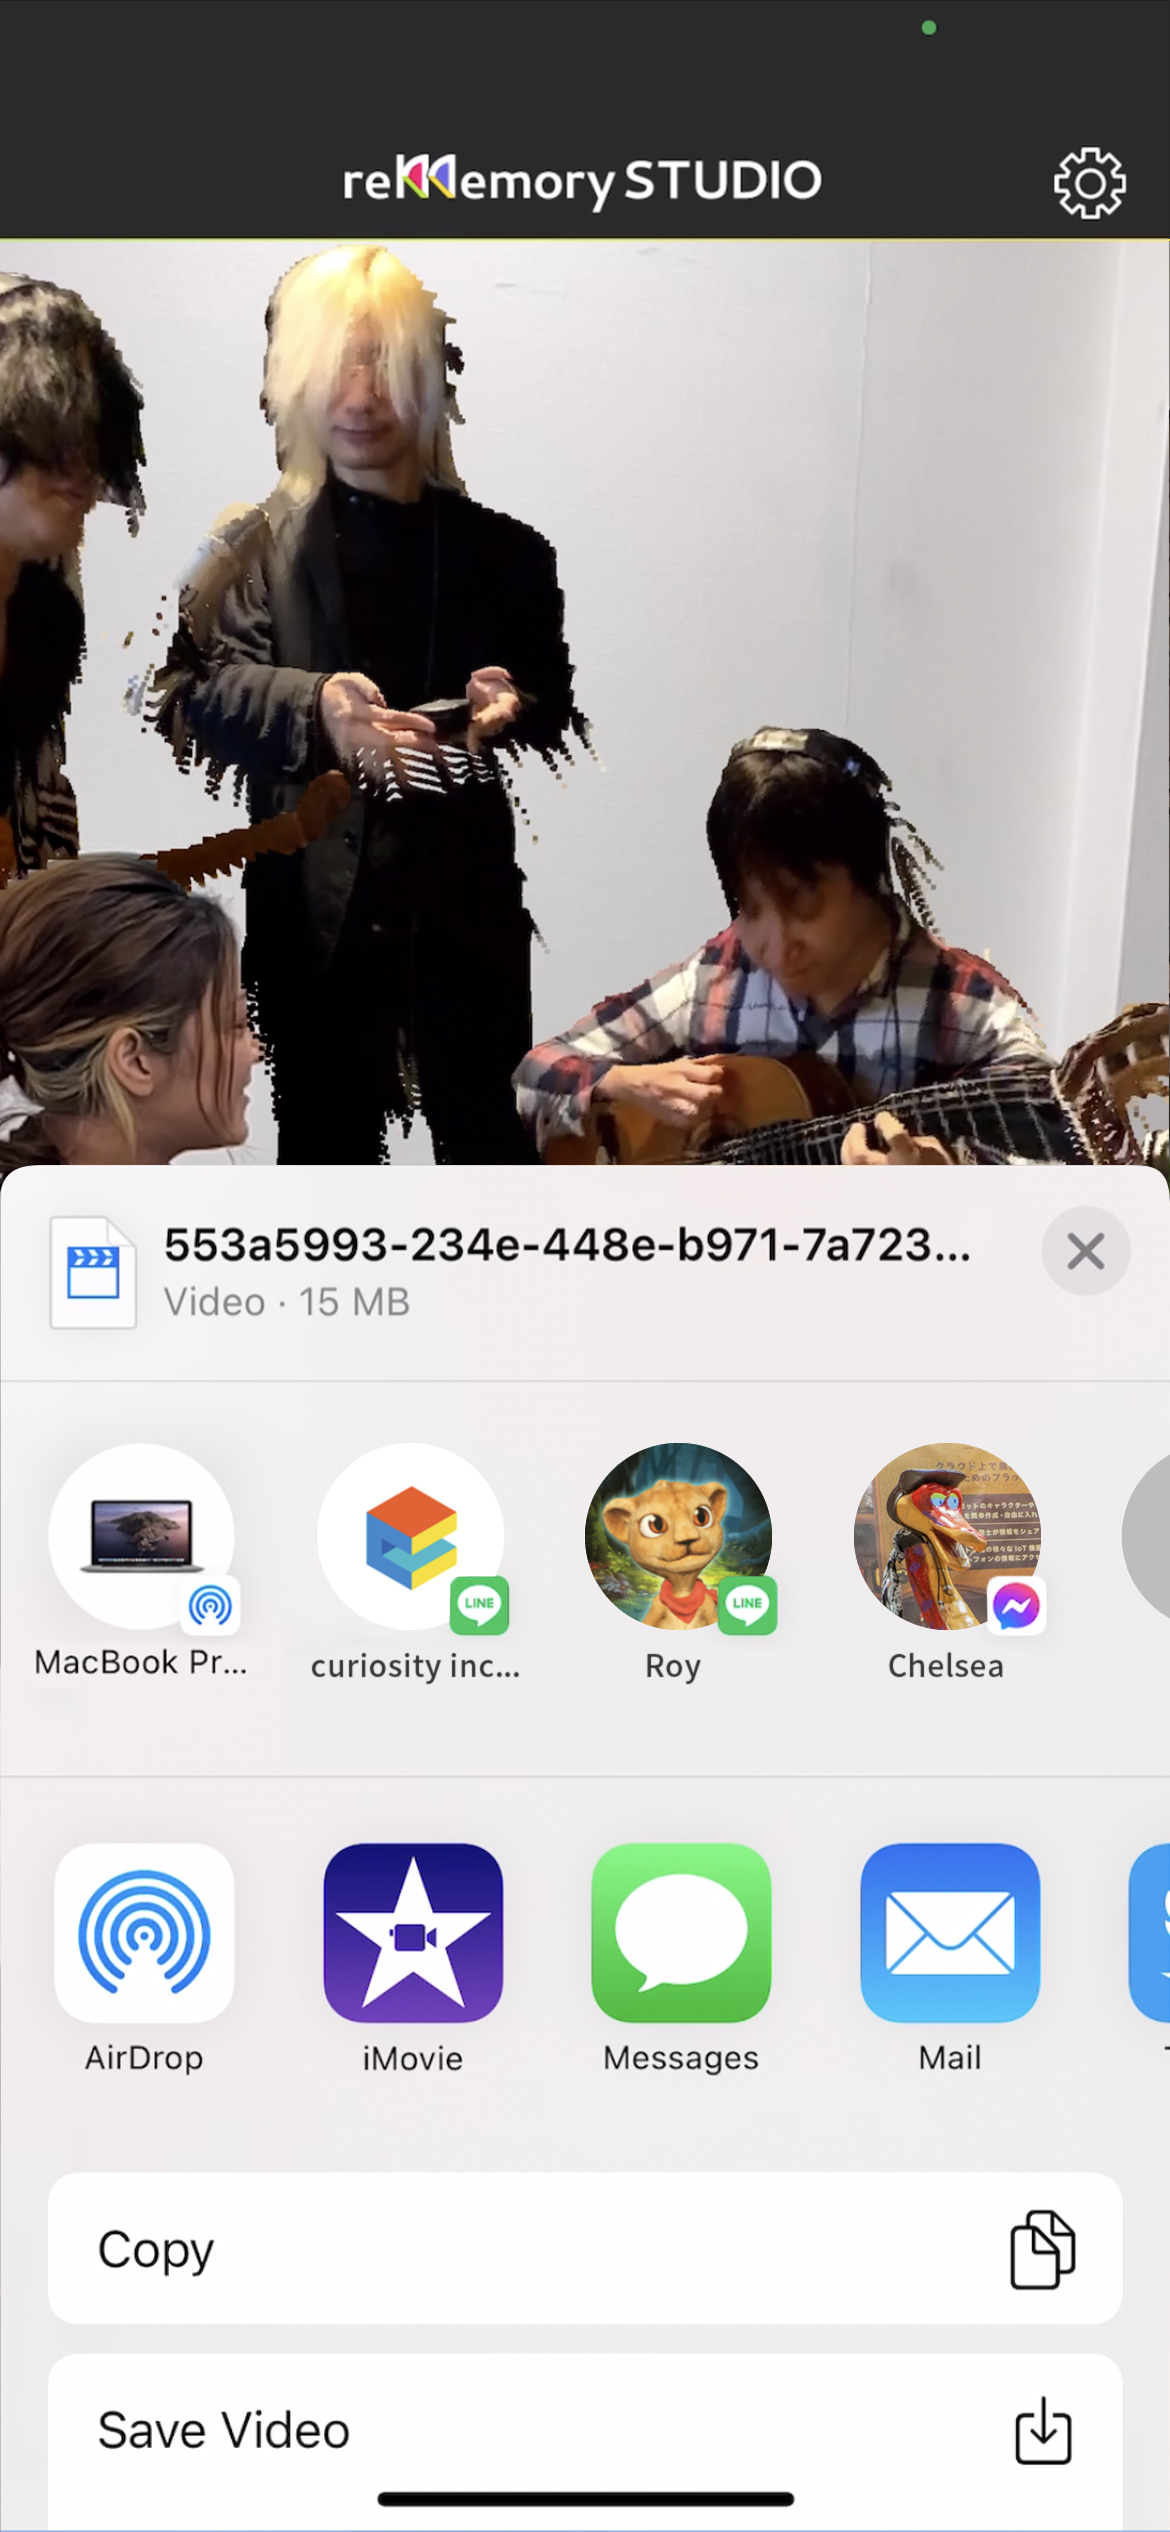
ビデオアイコンを再度タップして録画を終了すると、iPhoneのデフォルトのカメラと同じように、デバイスへ保存・シェアの選択ポップアップが表示されます。 SNSへ共有したり、PC等に直接アップロードすることも可能です。
撮影しなくても、完成されたボリュメトリックビデオの視聴を楽しむことができます。
最新のiPhone/iPadでなくとも、AR対応端末であれば完成データを視聴することができます。
1.コンテンツをダウンロードする
01.データをダウンロード
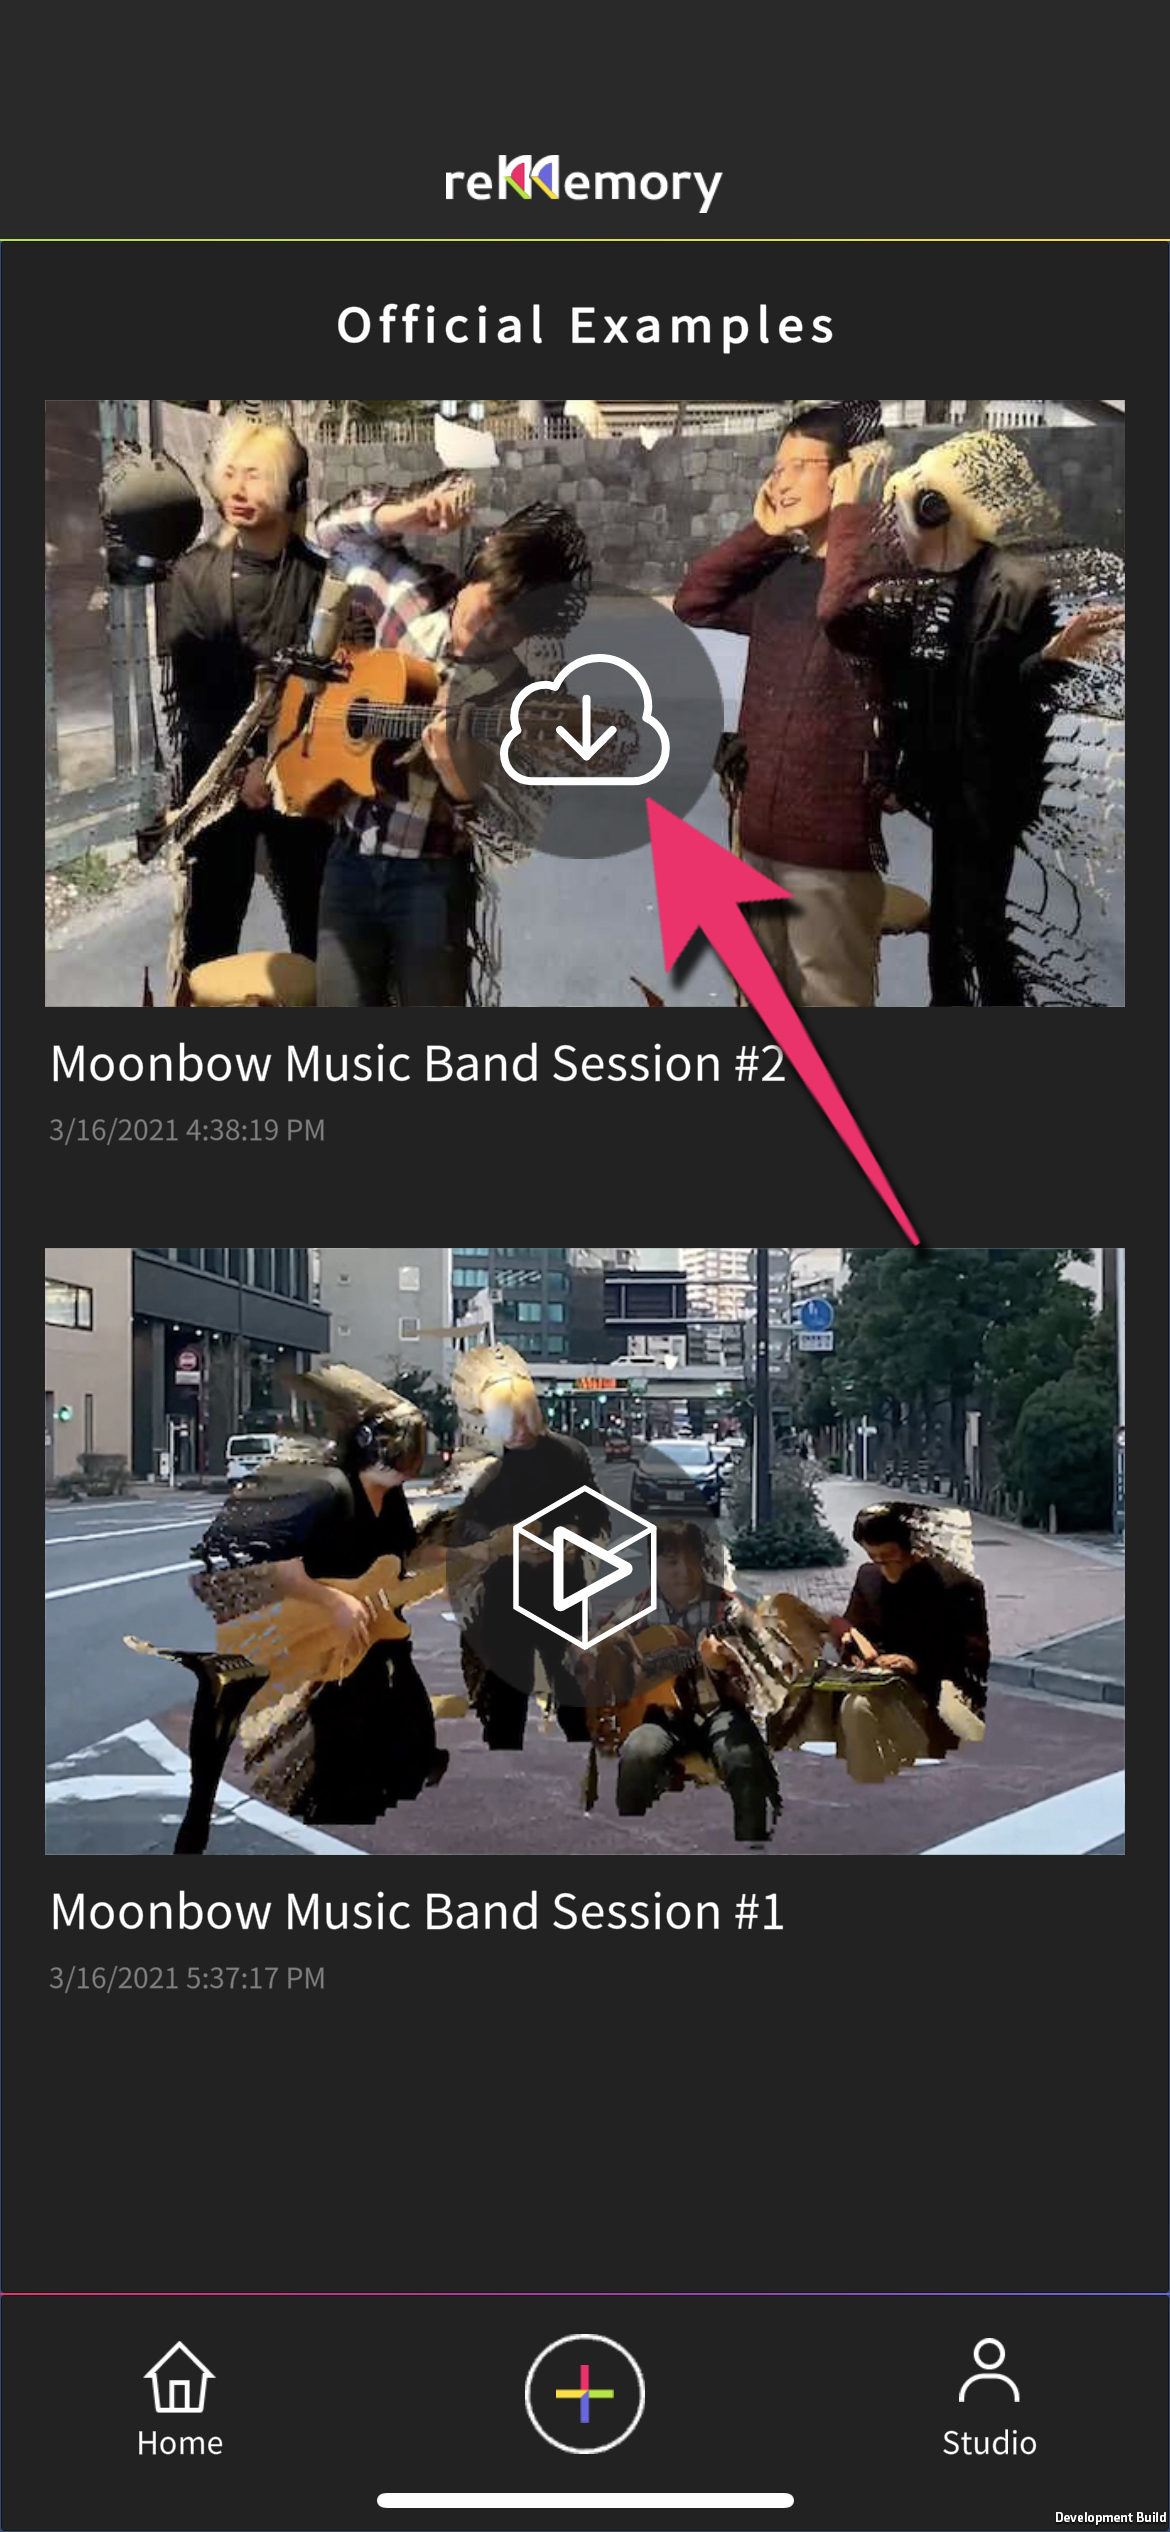
Homeから視聴したいコンテンツを選び、ダウンロードしましょう。 URLで共有されたデータを開く場合、自動でアプリが立ち上がります。
02.コンテンツを選択
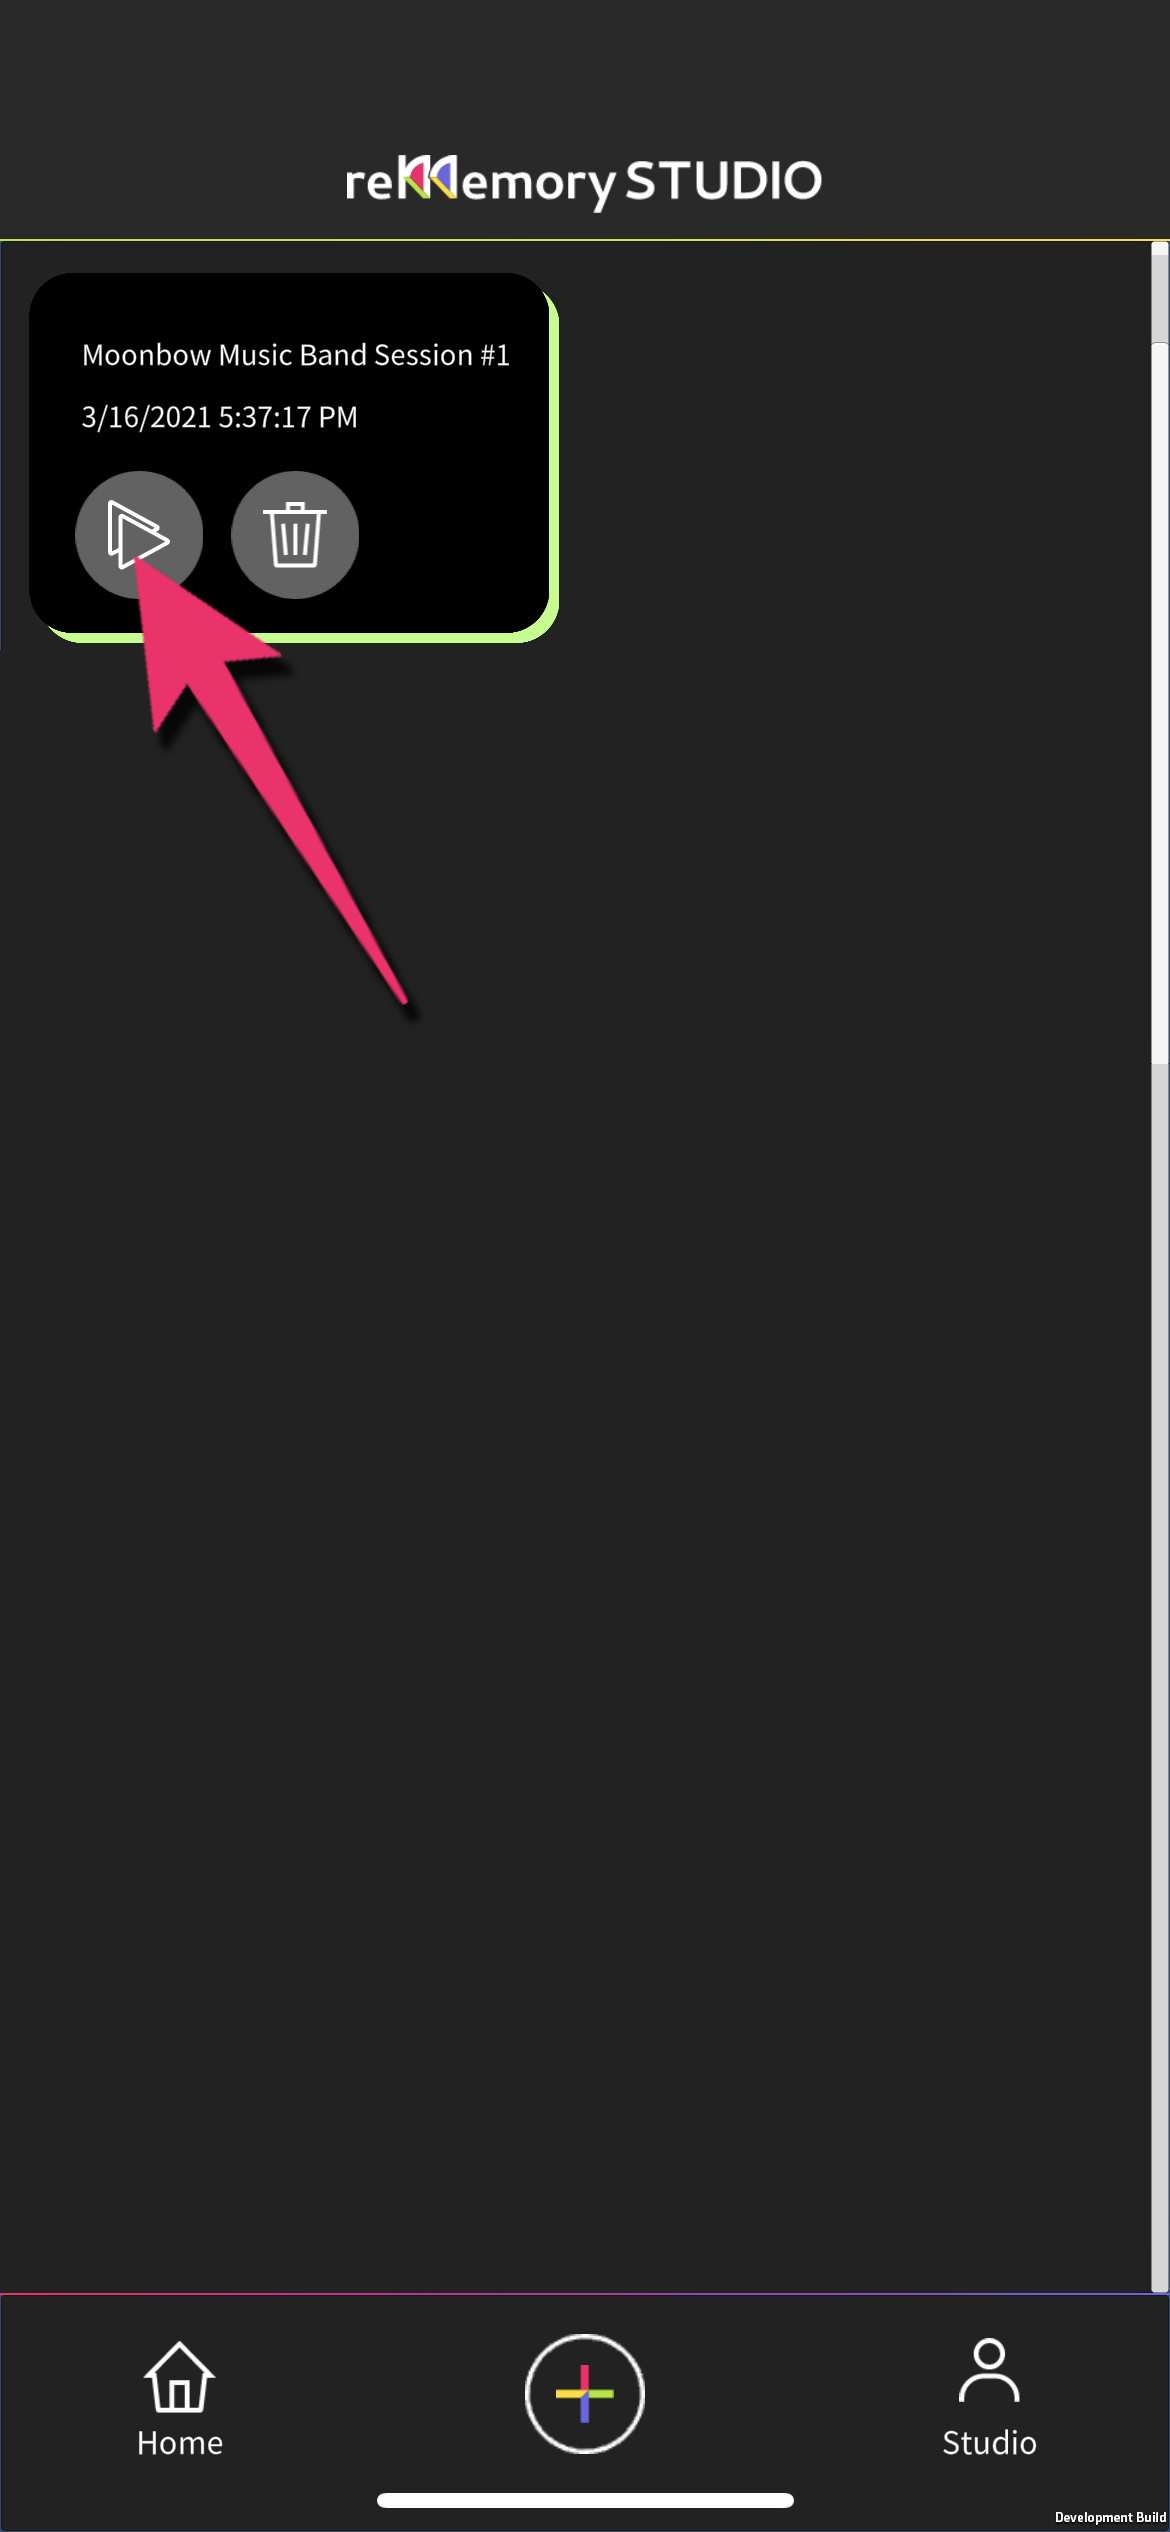
ダウンロードすると、コンテンツがマイスタジオに格納されます。 「再生」をタップしてボリュメトリックを呼び出しましょう。
2.基準位置を決めよう。
01.平面を認識
ARが立ち上がったら、平面にドットが表示されるまでカメラでゆっくりと周囲を見渡してください。
02.基準位置を選択.
ドットがついた平面から撮影の基準位置となる場所を選んでタップします。 この位置を中心にコンテンツが現れるので、なるべく壁から離れた位置を選んでください。
03.位置を決定する
基準位置をタップすると、時計のマークが平面上に表示されます。 OKなら「この場所に決定」ボタンを押します。選び直す場合は、平面上の他の場所をタップすればマークの位置が変わります。
3.好きな角度で観賞しよう
コンテンツを再生しよう
右下の「全て再生」ボタンから、コンテンツに含まれている全てのシーンを再生できます。
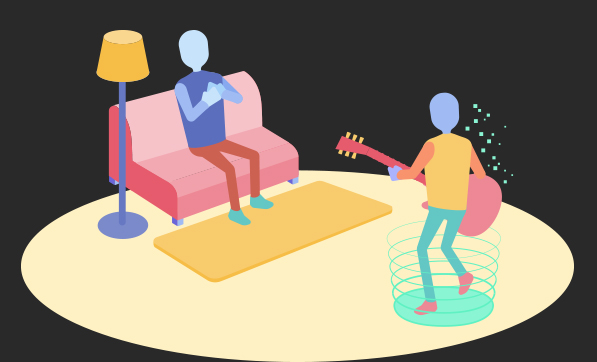
自分も一緒に撮影できる!
表示されたボリューメトリックの中に、自分も一緒に入ることができます。 アーティストと一緒に演奏することも!
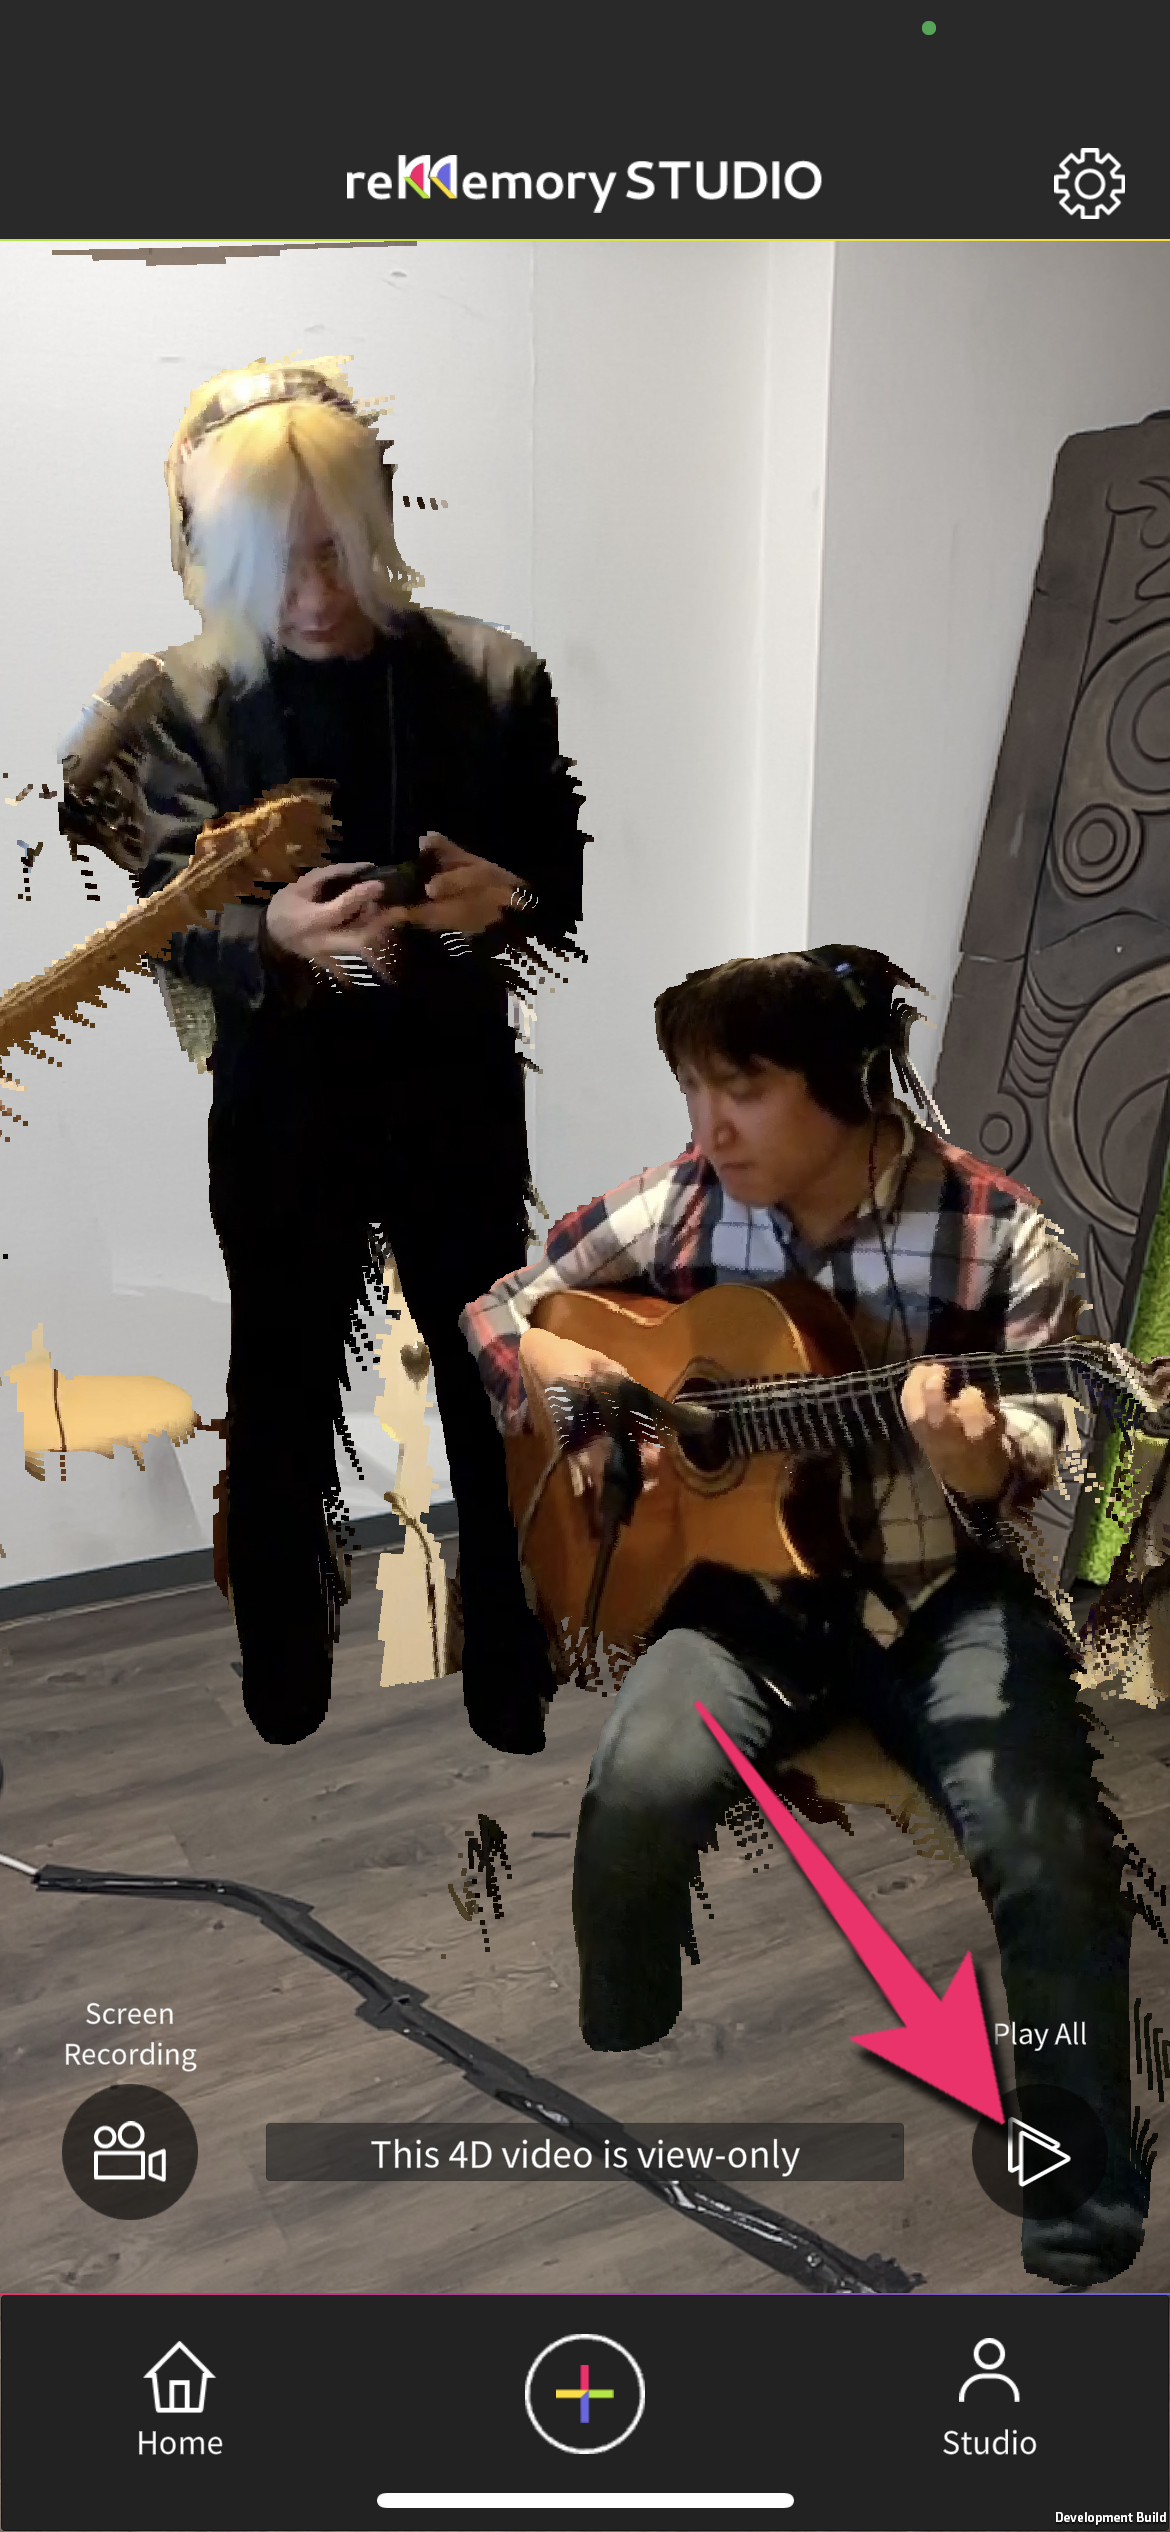
ビデオ撮影も可能
視聴のみのコンテンツも、ビデオ撮影することは可能です。 さまざまな角度からの撮影を楽しみましょう。